How to Charge a Razor Scooter: Quick and Easy Steps
Picture this: you’re ready to zip around the neighborhood on your Razor scooter, but it’s out of power. Frustrating, right?
Knowing how to charge your Razor scooter efficiently can mean the difference between a smooth ride and a disappointing day. This guide is tailored just for you, breaking down the process into simple steps so you can get back on the road faster.
Imagine the freedom and fun waiting for you once your scooter is fully charged and ready to roll. Let’s dive in and ensure you never miss a moment of adventure!
Checking The Battery Level
Checking the battery level is crucial before charging a Razor scooter. Ensure the scooter is off and the charger is correctly plugged in. A properly charged battery ensures a smooth and long-lasting ride.
When you own a Razor scooter, keeping track of the battery level ensures you’re never left stranded. Imagine planning a fun day out, only to find your scooter can’t make it past the driveway. By regularly checking the battery level, you save yourself from such disappointments and extend the life of your scooter. Let’s dive into how you can easily monitor your Razor scooter’s battery.Understanding The Battery Indicator
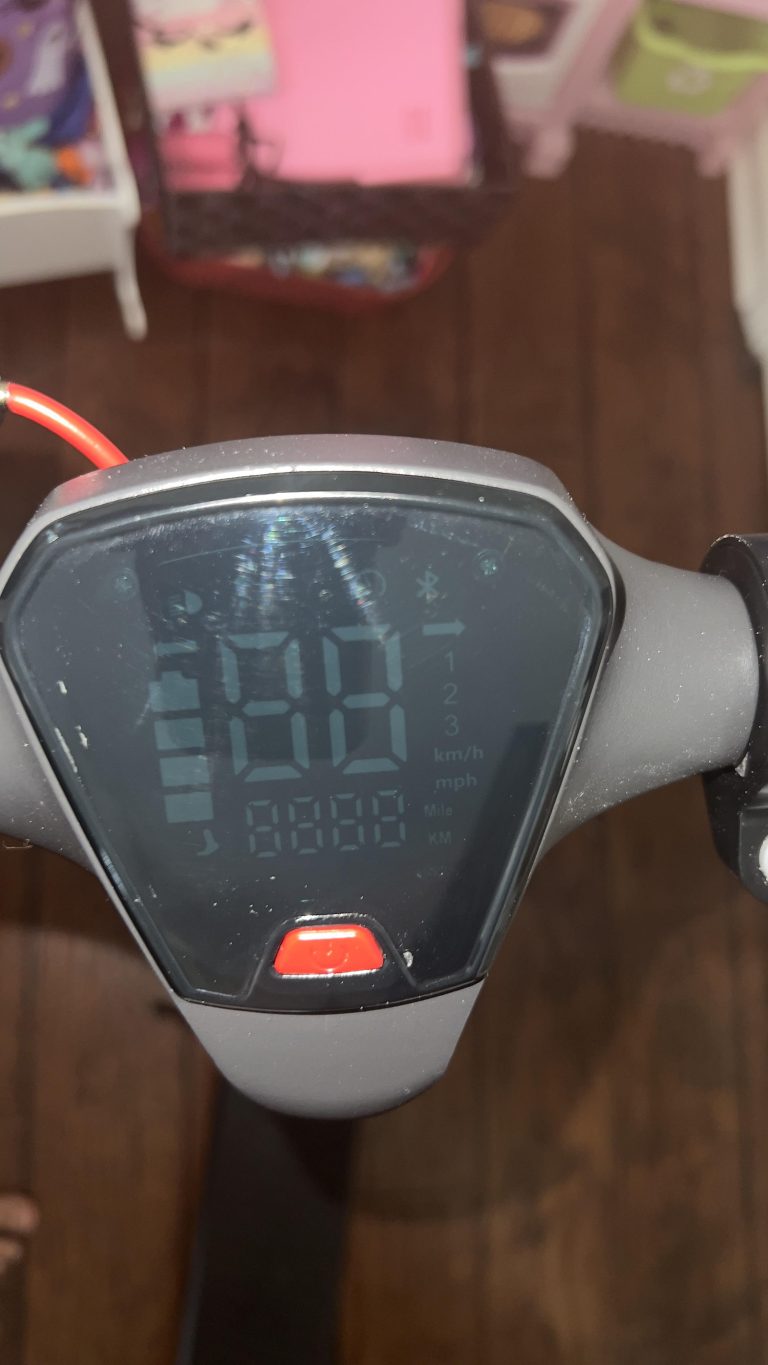
Most Razor scooters come equipped with a battery indicator. It’s usually a series of LED lights on the handlebar. Green means fully charged, yellow indicates a half charge, and red warns you that it’s time to power up. Checking the indicator should be your first step before any ride. This simple habit can prevent unexpected stops and keep your scooter in top shape.Manual Battery Check
Not all scooters have a built-in indicator. If yours lacks one, don’t worry. You can manually check the battery using a multimeter. First, locate the battery compartment, usually found under the deck. Carefully disconnect the battery, then use the multimeter to check the voltage. Compare it with the specifications in your manual to know if it’s time to charge.Keep Track Of Usage Time
Think about how long you typically ride. Most Razor scooters offer a runtime of about 40 minutes on a full charge. If you’ve been out and about for close to that time, it’s smart to recharge soon. This approach requires a bit of memory but pays off when you avoid battery depletion on a fun day out.Set A Routine
Setting a regular schedule for checking your scooter’s battery can be a game-changer. Perhaps every Sunday, you check and charge if necessary. Routine checks mean fewer surprises and more reliable rides. Plus, it could save you from needing a new battery sooner than expected.Consider Environmental Factors
Did you know that temperature affects battery performance? Colder climates can decrease battery life. If you notice your battery draining faster in the winter, this might be why. Consider storing your scooter in a warmer place or charging it more often during colder months. This small adjustment can make a big difference in battery longevity. By consistently checking the battery level of your Razor scooter, you maximize your ride time and minimize interruptions. What strategies do you use to ensure your scooter is always ready to go? Share your thoughts and experiences!Gathering Necessary Equipment
Charging a Razor scooter doesn’t require much equipment. Ensure you have the right tools. This helps the charging process go smoothly.
Charger Compatibility
First, check the charger compatibility. Razor scooters need specific chargers. Look at your scooter’s manual. It tells you which charger to use. Using the wrong charger can harm your scooter. Always confirm the charger matches the scooter model.
Power Source Availability
A stable power source is crucial. Find a reliable outlet for charging. The outlet should be near your charging spot. Use an outlet that provides consistent power. This prevents charging issues. Avoid outlets with known problems or fluctuations.
Preparing The Scooter
Getting ready to charge your Razor scooter is more than just plugging it in. It’s about ensuring that everything is set for a safe and efficient charging session. Preparing your scooter properly can extend its life and maximize performance. Let’s walk through some simple steps you can follow to make sure your scooter is ready to charge.
Turning Off The Scooter
First, make sure your scooter is turned off before charging. This is crucial to prevent any electrical mishaps. It’s like the first step in preparing a delicious meal; you gather your ingredients first. You wouldn’t want to risk any electrical damage by leaving it on. So, just flip the switch and power it down.
Locating The Charging Port
Next, find the charging port on your scooter. It’s usually located on the side or near the battery compartment. Imagine you’re searching for a hidden treasure; the charging port is your prize. Once you locate it, inspect it for dirt or debris. A clean port ensures a smooth charging process. Have you ever thought how a tiny speck of dust could affect performance?
By turning off the scooter and finding the charging port, you’re well on your way to a successful charging session. Remember, preparation is key to keeping your scooter running smoothly. Do these steps resonate with your charging routine? Share your experiences in the comments below!

Credit: www.amazon.com
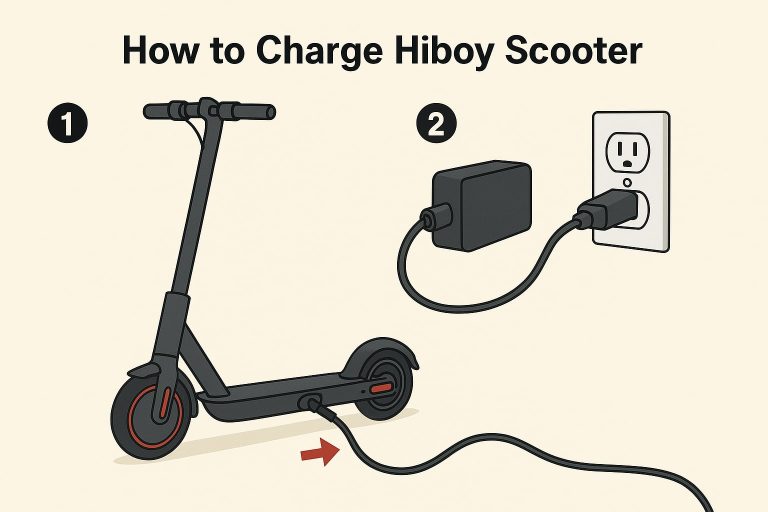
Connecting The Charger
Ensure the scooter is off before charging. Locate the charging port, usually near the base. Connect the charger securely and plug it into a power outlet. Charging typically takes several hours, so patience is key.
Connecting the charger is a critical step in ensuring your Razor scooter is ready for action. This simple task can make the difference between a fun day out and a frustrating experience of a scooter running out of power halfway through your journey. Knowing how to do it properly can save you from unnecessary hassle and keep your scooter running smoothly.Plugging Into The Charger
First things first, locate the charging port on your Razor scooter. It’s usually positioned near the base of the scooter for easy access. Once found, make sure you have the correct charger for your model. Using the wrong one can damage your battery and void your warranty. Align the charger plug with the port, ensuring it fits snugly. It should slide in easily without forcing it. Ever tried plugging something in the dark and missed? It’s frustrating! So, make sure you have enough light to see what you’re doing.Securing The Connection
Once plugged in, check the connection. A loose plug can result in your scooter not charging properly. A secure connection should feel firm with no wiggle room. If it feels loose, try adjusting it until it’s stable. The charger indicator light should illuminate, signaling that charging is underway. If not, recheck the connection or try another outlet. Have you ever wondered why your scooter doesn’t charge even when plugged in? Sometimes it’s as simple as a loose connection. By ensuring a tight, stable connection, you can avoid the frustration of not having a fully charged scooter when you need it.Charging Time And Monitoring
Charging a Razor Scooter involves plugging the charger into the scooter and a power outlet. Monitor the charging process by checking the indicator light; it turns green when fully charged. Regularly charging and monitoring ensures optimal performance and battery longevity.
Charging your Razor scooter is a straightforward task, but understanding the nuances of charging time and monitoring can make a big difference. It’s not just about plugging in and waiting; there’s a bit more strategy involved. Knowing how long to charge and keeping an eye on the indicators can extend the life of your scooter’s battery and ensure you’re always ready to ride.Estimated Charging Duration
Charging times vary depending on the model of your Razor scooter. Most models require around 12 to 24 hours for a full charge when completely depleted. It’s essential to refer to your specific model’s manual for the exact duration. Have you ever left your phone charging overnight only to find it still dead in the morning? That’s what you want to avoid with your scooter by knowing the correct charging time.Monitoring The Charging Indicator
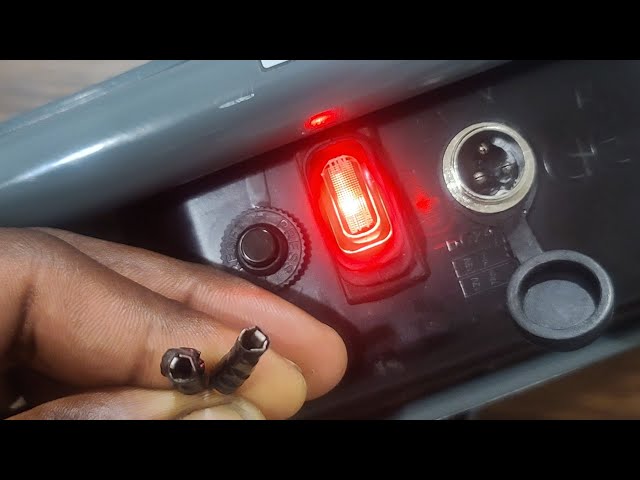
The charging indicator is your best friend during this process. Most Razor scooters have a light that changes color or blinks when charging. A red light typically means charging, and a green light often indicates a full charge. Keep an eye on this indicator to avoid overcharging, which can damage the battery. You wouldn’t let your coffee machine run dry without checking it, right? The same attention should be given to your scooter’s charging status. Do you check your phone’s battery percentage regularly? Apply the same habit here to ensure your scooter is ready when you need it. Monitoring and understanding these indicators ensure your scooter remains in top shape and ready to hit the road whenever you are.
Credit: www.amazon.com
Disconnecting And Storing
Charging your Razor scooter is only part of the process. Proper disconnection and storage are key to maintaining charger longevity. These steps ensure safety and efficiency. Follow these guidelines to keep your charger in top condition.
Unplugging The Charger
Ensure the scooter is off before unplugging. This prevents electrical issues. Gently pull the charger plug from the scooter socket. Avoid yanking the cord to prevent damage. Check for any signs of wear on the charger or cord.
Storing The Charger Safely
Find a cool, dry place for storage. Avoid places with high moisture. Keep the charger away from direct sunlight. Store it in a well-ventilated area. This prevents overheating and extends charger life. Use a container to keep the charger and cord organized. This reduces tangling and potential damage.
Maintaining Battery Health
Charging a Razor scooter properly ensures long battery life. Always use the charger provided by Razor. Avoid overcharging; unplug once fully charged. Keep the scooter away from extreme temperatures.
Maintaining battery health is crucial for the longevity of your Razor scooter. Proper care ensures efficient performance and longer rides. Understanding how to charge and maintain the battery helps avoid unwanted replacements. Here are some effective strategies for keeping your scooter’s battery in top shape.Regular Charging Tips
Charge the scooter after every ride, even short ones. This keeps the battery active and ready. Store the scooter with a fully charged battery. This prevents it from discharging over time. Use the charger provided by Razor for optimal results. Other chargers might damage the battery. Ensure the charging port is clean and dry before connecting. Dirt can hinder the charging process. Follow the manual for charging instructions specific to your model.Avoiding Overcharging
Unplug the charger once the battery reaches full charge. Overcharging can lead to battery damage. Use a timer to remind you to disconnect the charger. This simple step can extend battery life. Avoid charging the scooter overnight. Long charging sessions increase the risk of overcharging. Check if your model has an automatic shut-off feature. This can prevent overcharging and add convenience. Keep an eye on the charging indicator light. It signals when the battery is fully charged.
Credit: www.youtube.com
Frequently Asked Questions
How Do You Charge Your Razor Scooter?
Plug the charger into a wall outlet. Connect the charger to the scooter’s charging port. Ensure the indicator light on the charger turns red, showing it’s charging. When the light turns green, the scooter is fully charged. Always use the charger provided by Razor for safety.
How Do I Know If My Electric Scooter Is Charging?
Check the scooter’s indicator light. A steady or blinking light usually means it’s charging. Refer to the manual for specific light signals.
Why Won’t My Razor Scooter Charge?
Your Razor scooter may not charge due to a faulty battery, loose connections, or a broken charger. Check for damage and ensure all parts are securely connected. If issues persist, consider replacing the battery or charger. Regular maintenance can prevent charging problems and extend your scooter’s lifespan.
Why Is My Razor Scooter Charger Staying Green?
The Razor scooter charger stays green when the battery is fully charged. It might also indicate a faulty charger or connection issue. Ensure the battery is properly connected and the charger is functioning correctly. Check the user manual for troubleshooting tips or contact Razor support for assistance.
Conclusion
Charging your Razor scooter is simple with the right steps. First, find the correct charger. Plug it into a wall outlet. Connect the charger to your scooter. Wait for the light to change color. This signals a full charge. Remember, regular charging keeps your scooter ready.
Always check your battery level before rides. This prevents unexpected stops. Follow these steps for a smooth experience. Enjoy your scooter rides without worry. Keep your scooter in top shape with proper care. Happy scooting!

Ethan Montgomery is the administrator of carweldhub.com and an expert in the automotive industry. With hands-on experience in welding and a deep understanding of automotive parts and accessories, Ethan brings a wealth of practical knowledge to his work. His passion for the automotive field extends to blog writing and editing, where he shares valuable insights and tips with enthusiasts and professionals alike. Whether you’re looking for detailed technical advice or the latest trends in automotive technology, Ethan’s expertise makes him a trusted resource in the automotive community.