How to Take Out a Ball Joint: Easy Step-by-Step Guide
If you’re working on your car and need to take out a ball joint, you might feel unsure where to start. Removing a ball joint can seem tricky, but with the right steps, you can do it yourself and save time and money.
In this guide, you’ll learn exactly how to take out a ball joint safely and efficiently. By the end, you’ll feel confident tackling this task on your own, even if you’ve never done it before. Keep reading, and let’s get your car back in perfect shape!

Credit: www.youtube.com
Tools Needed
Removing a ball joint requires the right set of tools. Having these tools ready makes the job easier and safer. Each tool plays a specific role in the process. This section covers the essential hand tools, specialty tools, and safety gear needed.
Essential Hand Tools
- Socket set with ratchet and extensions
- Wrenches in various sizes
- Hammer for loosening parts
- Pliers for gripping and pulling
- Breaker bar for stubborn bolts
- Flathead screwdriver for prying
- Torque wrench to tighten bolts properly
Specialty Ball Joint Tools
- Ball joint separator tool (pickle fork)
- Ball joint press kit for removal and installation
- C-clamp or hydraulic press for heavy-duty joints
- Snap ring pliers if your ball joint has snap rings
- Grease gun for lubricating new ball joints
Safety Equipment
- Safety glasses to protect eyes from debris
- Mechanic gloves to protect hands
- Jack stands to securely support the vehicle
- Wheel chocks to prevent movement
- Dust mask if rust or dirt is present

Credit: www.youtube.com
Prepare The Vehicle
Ensure the vehicle is parked on a flat surface and the parking brake is set. Loosen the lug nuts before lifting the car with a jack and secure it on stands. This makes removing the ball joint safer and easier.
Before you can dive into the nitty-gritty of removing a ball joint, it’s crucial to prepare your vehicle properly. This step ensures safety and efficiency as you work on your car. Preparing the vehicle involves getting your car to a stable and accessible position, which is essential for a smooth repair process.
Lift And Secure The Car
Start by parking your vehicle on a flat, stable surface. Engage the parking brake to prevent any accidental movement. Use a reliable jack to lift the car, placing it under the recommended jacking points. Once the car is raised, don’t rely solely on the jack. Secure it with jack stands for added safety. This creates a stable working environment, allowing you to focus on the task without worrying about the car shifting.
Remove The Wheel
With the car securely lifted, it’s time to remove the wheel. Use a lug wrench to loosen the lug nuts before fully taking them off. Be sure to keep track of the nuts, perhaps storing them in a small container to avoid losing them. After removing the wheel, you’ll have easier access to the suspension components. This step is crucial for getting a clear view and reach of the ball joint. Have you ever tried juggling multiple tasks at once? Removing the wheel is like clearing your desk before starting a big project.
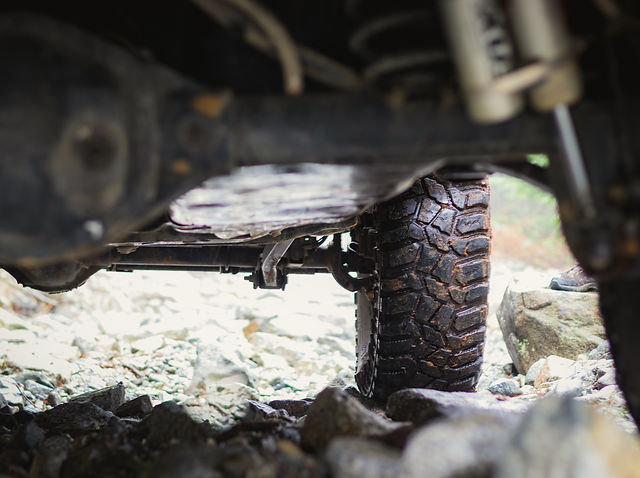
Access The Ball Joint
Now that the wheel is off, locate the ball joint. It’s usually found connected to the steering knuckle and control arm. Use a flashlight if visibility is poor; you want to clearly see what you’re working on. Consider taking a quick picture of the setup before you start dismantling anything. This can be helpful for reassembly later. Are you wondering how mechanics remember where everything goes? A quick photo can be a lifesaver for DIYers.
Loosen Suspension Components
Loosening suspension components is a crucial part of taking out a ball joint. You need to carefully disconnect parts that hold the joint in place without causing damage to other components. This step ensures you have enough movement and access to safely remove the ball joint later.
Disconnect Control Arm
The control arm connects the suspension to the frame and holds the ball joint. Start by removing the bolts or nuts attaching the control arm to the vehicle. Use a wrench or socket set to carefully loosen these fasteners.
Sometimes, the control arm may feel stuck due to rust or tight fittings. Gently tapping with a rubber mallet can help release it. Have you noticed how freeing the control arm early makes the rest of the job smoother?
Remove Brake Caliper And Rotor
Next, remove the brake caliper and rotor to clear the area around the ball joint. This step prevents damage to the brake system and gives you more room to work. Use a socket or wrench to unbolt the caliper and hang it safely using a piece of wire or a bungee cord—never let it dangle by the brake hose.
After the caliper is off, slide the rotor free from the hub. If the rotor is stuck, a few gentle taps usually free it up. Removing these parts first makes separating the ball joint easier and safer.
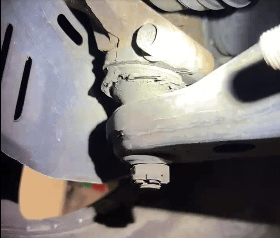
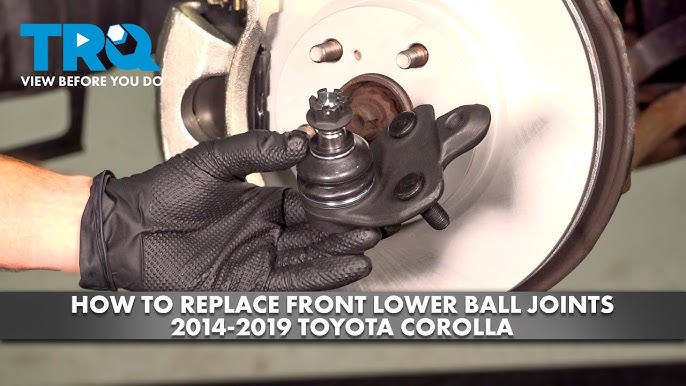
Separate Steering Knuckle
The steering knuckle holds the ball joint and connects it to the wheel assembly. To separate it, first remove any retaining clips or bolts securing the ball joint stud. Then, use a ball joint separator tool or a pickle fork to carefully pry the knuckle away from the ball joint.
Be patient here—forcing the parts apart can cause damage. Have you tried applying penetrating oil? It often loosens stubborn connections and reduces the effort needed.
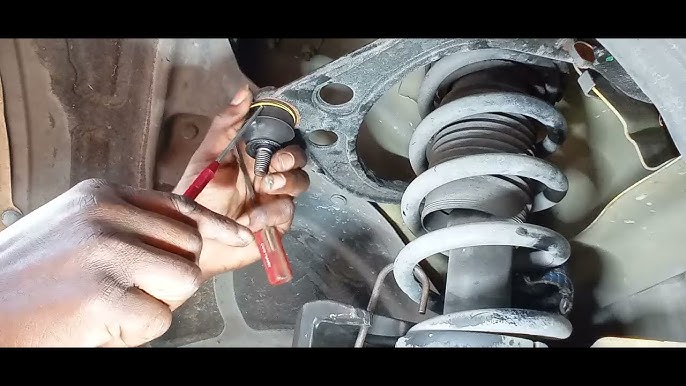
Remove The Ball Joint
Removing the ball joint is a key part of many car repairs. It needs care and the right tools. The ball joint connects the wheel to the suspension. Removing it carefully avoids damage to other parts. This section explains three common ways to remove the ball joint safely and effectively.
Use Ball Joint Separator
A ball joint separator tool makes removal easier. Place the tool between the ball joint and control arm. Tighten the tool to push the joint free. It reduces risk of damage to surrounding parts. This tool fits most ball joints and works well for tight spaces.
Hammer And Pry Techniques
Sometimes a hammer and pry bar help free the ball joint. Use a hammer to tap the joint gently. Then, insert the pry bar to lift the joint out. Work slowly to avoid bending or breaking parts. This method needs patience and steady hands.
Press Out The Ball Joint
Using a ball joint press is effective for stubborn joints. Position the press over the joint and tighten it. The press pushes the ball joint out evenly. This method prevents damage to the control arm. A press is a good tool for tough removals.
Inspect And Clean Parts
Inspecting and cleaning parts is crucial before installing a new ball joint. Dirt and damage can cause poor fit and early failure. Clean parts ensure a smooth installation and longer life for your suspension system.
Check For Wear And Damage
Look closely at the ball joint and surrounding components. Check for cracks, rust, or excessive wear. Examine the control arm and mounting points too. Replace any damaged parts to avoid future problems.
Clean Mounting Surfaces
Remove dirt, grease, and rust from all mounting surfaces. Use a wire brush or sandpaper for stubborn spots. Clean surfaces help the new ball joint sit flush and secure. Wipe with a clean cloth to remove debris after cleaning.
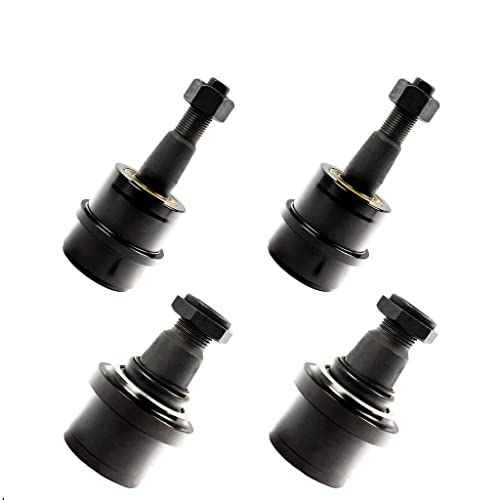
Prepare For New Ball Joint Installation
Gather all needed tools and parts before starting. Apply a thin layer of grease on the mounting surfaces. Align the new ball joint carefully to avoid damage. Double-check all parts are clean and ready for installation.
Tips For Easier Removal
Removing a ball joint can be a tough job if you’re not prepared. The right approach can save you time and frustration. Here are some practical tips to make the removal process smoother and more effective.
Apply Penetrating Oil
Start by spraying a generous amount of penetrating oil on the ball joint and surrounding areas. Let it sit for at least 15 to 30 minutes to loosen rust and corrosion.
Don’t rush this step. I once skipped it, and the joint barely budged, turning a quick task into a half-day ordeal. Patience here pays off.
Use a brush to work the oil into tight spots for better results. Reapply if necessary, especially on older vehicles with stubborn joints.
Use Heat Carefully
Applying heat can expand metal parts and break the bond holding the ball joint in place. Use a propane torch to warm the joint evenly, but avoid overheating.
Too much heat can damage nearby components like rubber boots or seals. Keep a heat shield or wet rag handy to protect sensitive parts.
Heat only after applying penetrating oil. This combination often loosens the joint faster than either method alone.
Avoid Common Mistakes
- Don’t force the joint with excessive hammering.It can damage the control arm or the ball joint itself.
- Avoid using the wrong tools.Using a puller designed for ball joints will prevent unnecessary damage and save effort.
- Check fasteners before removal.Removing bolts in the wrong order can make the joint harder to take out.
- Don’t ignore safety gear.Eye protection and gloves keep you safe from flying debris and hot surfaces.
Have you ever struggled with a stuck ball joint? Sometimes, stepping back and reconsidering your approach makes all the difference.
Credit: www.youtube.com
Frequently Asked Questions
What Tools Are Needed To Take Out A Ball Joint?
To remove a ball joint, you need a ball joint separator, socket set, hammer, and jack stands. These tools help safely disconnect and extract the joint from the control arm.
How Do You Safely Remove A Ball Joint?
First, lift the vehicle and secure it with jack stands. Then, remove the wheel and loosen the ball joint nut before using a separator tool to disconnect it carefully.
Can I Remove A Ball Joint Without Special Tools?
Removing a ball joint without special tools is difficult and risky. A ball joint separator is essential to avoid damaging suspension components and ensure safe removal.
How Long Does It Take To Remove A Ball Joint?
Removing a ball joint typically takes 30 to 60 minutes for an experienced person. Time varies based on vehicle type and tool availability.
Conclusion
Removing a ball joint takes patience and the right tools. Follow each step carefully for safety. Take your time to avoid damage or injury. Check your work often during the process. Practice helps you get better and faster. This guide can help you handle the job at home.
Stay focused, and don’t rush the task. Your car’s suspension depends on a good ball joint. Keep your tools ready for future repairs. Simple steps lead to a successful fix.

Automotive Specialist & Expert Writer
Tyler Kingston is a passionate automotive writer with a wealth of knowledge in all things cars. With years of experience in the automotive industry, Tyler specializes in everything from vehicle maintenance to the latest car technologies and innovations. He is known for his ability to break down complex automotive concepts into easily digestible, engaging content for both novice and experienced car enthusiasts. Whether it’s detailing car repair techniques, reviewing new car models, or diving into the world of auto accessories, Tyler’s articles provide valuable insights to readers. His hands-on experience, combined with a genuine love for cars, allows him to deliver expert advice, tips, and news that keeps readers coming back for more.