How to Check Ball Joints With Pry Bar: Easy DIY Inspection Tips
If you want to keep your vehicle safe and running smoothly, checking your ball joints is a must. But how can you tell if they’re worn out without expensive tools?
The answer is simpler than you think. By using a pry bar, you can quickly inspect your ball joints right at home. You’ll learn step-by-step how to do it easily and accurately. Keep reading—you’ll save time, money, and avoid unexpected breakdowns by knowing exactly what to look for.
Tools Needed
Checking ball joints with a pry bar requires the right tools to ensure safety and accuracy. Using proper equipment makes the job easier and helps identify worn or damaged parts. Preparing tools before starting saves time and avoids frustration during inspection.
Selecting The Right Pry Bar
Choose a pry bar that fits well in tight spaces around the ball joint. A medium-sized pry bar, about 12 to 18 inches long, works best. Look for one with a flat, sturdy tip to apply leverage without slipping. A pry bar with a comfortable handle reduces hand fatigue during use.
Additional Tools For Inspection
- Jack and jack stands – to lift and support the vehicle safely.
- Wheel chocks – to prevent the car from rolling.
- Flashlight – to see the ball joint clearly in dark areas.
- Gloves – to protect your hands from dirt and sharp edges.
- Torque wrench – for tightening bolts after inspection.
Preparing Your Vehicle
Begin by safely lifting the vehicle and removing the wheel for clear access. Use a pry bar to gently test the ball joint for any looseness or play.
Preparing your vehicle is a crucial step when checking ball joints with a pry bar. A solid preparation ensures safety and efficiency during the inspection. Whether you’re a seasoned mechanic or a DIY enthusiast, making sure your vehicle is ready will save you time and hassle. Let’s dive into the essential steps to get your car set up properly.
Securing The Car Safely
Before anything else, ensure your vehicle is parked on a flat, stable surface. Engage the parking brake to prevent any movement. It’s not just about convenience—it’s about safety. Use wheel chocks behind the tires to prevent rolling. You might think it’s an overkill, but a little precaution goes a long way. Have you ever considered what could happen if the car rolls unexpectedly?
Lifting The Vehicle Properly
Place a hydraulic jack under the vehicle’s designated jacking point. Do you know where your vehicle’s jacking points are? They are usually indicated in the owner’s manual. Raise the vehicle until the wheel is off the ground. Once lifted, place a jack stand under the frame to support the weight. Never rely solely on a jack to hold your vehicle; it’s a risk not worth taking. Double-check everything before proceeding. A stable setup will give you peace of mind and allow you to focus on the task ahead. Remember, preparation is half the battle won!
Locating Ball Joints
Locating ball joints is the first step in checking their condition with a pry bar. Ball joints connect the wheel hubs to the suspension system. They allow smooth movement and steering control. Knowing where to find them helps spot issues early. This section explains how to identify ball joints on both front and rear suspensions.
Identifying Front Suspension Ball Joints
Front suspension ball joints usually sit near the wheel hub assembly. They connect the control arms to the steering knuckles. Look for a round joint covered by a rubber boot. The boot protects the joint from dirt and moisture. These ball joints can be either upper or lower, depending on your vehicle’s design.
- Lower ball joints are often attached to the lower control arm.
- Upper ball joints connect to the upper control arm or strut.
- They are usually visible behind the wheel when you turn it fully.
Use a flashlight to see clearly. Check for any torn rubber boots or rust. These signs may mean the ball joint needs inspection.
Spotting Rear Suspension Ball Joints
Rear suspension ball joints are less common but found on some vehicles. They connect the trailing arms or control arms to the wheel hub. These joints also have rubber boots for protection. Rear ball joints may be harder to spot due to tight space.
- Look under the vehicle near the rear wheels.
- Check where the suspension arms meet the wheel assembly.
- Use a pry bar carefully to test for movement once located.
Knowing the exact location helps check ball joints safely and effectively.
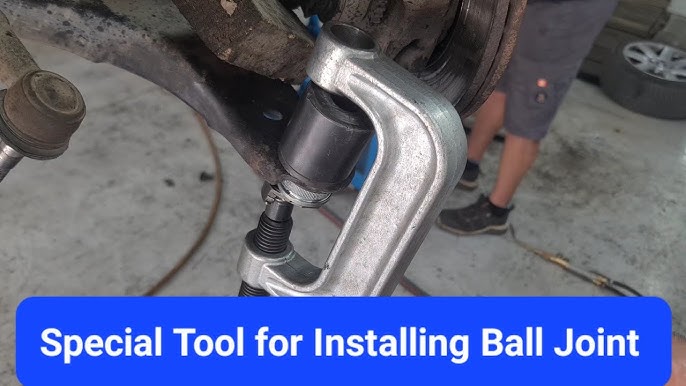
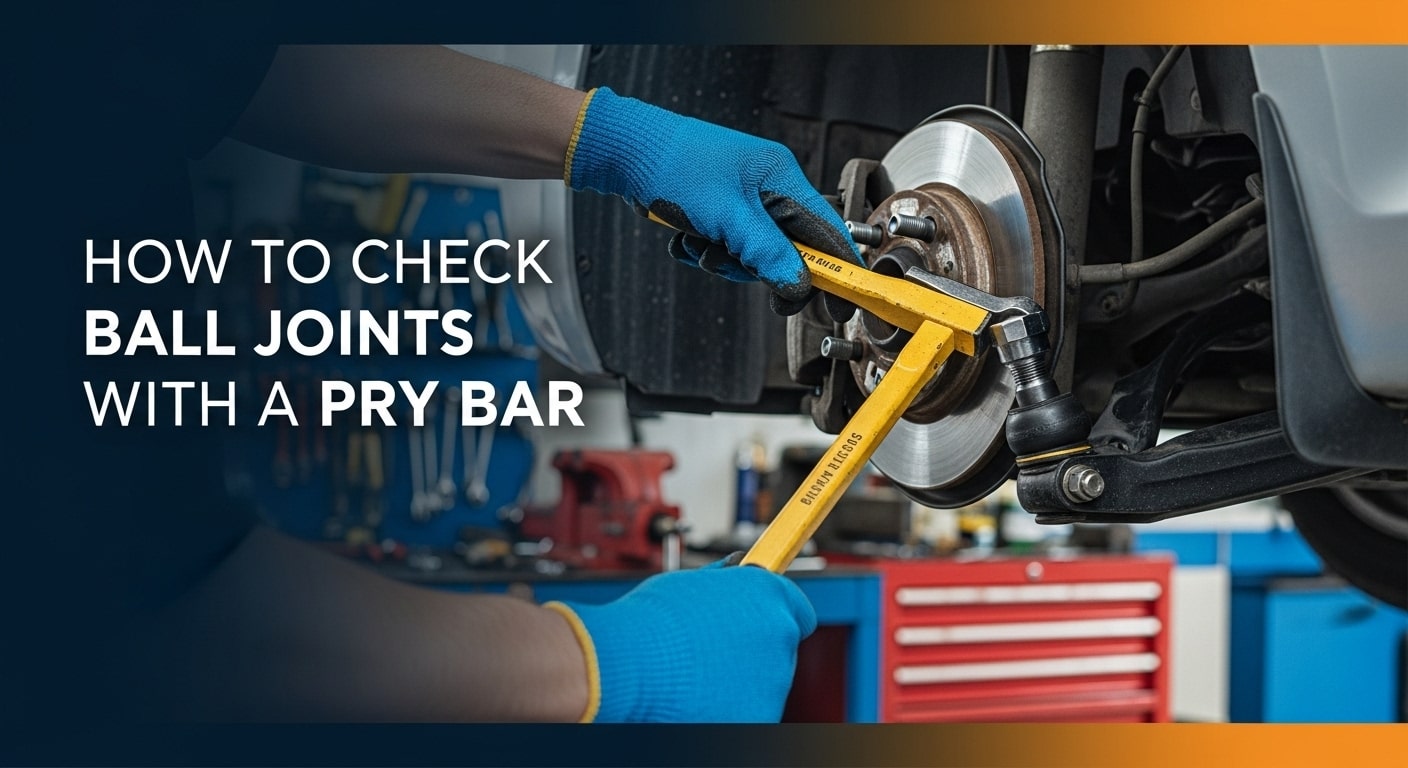
Performing The Pry Bar Test
Performing the pry bar test is a simple way to check ball joints for wear. This test helps identify looseness or damage that may affect vehicle safety. Using the right technique ensures accurate results and prevents damage to suspension parts. Follow these steps carefully to inspect the ball joints properly.
Positioning The Pry Bar Correctly
Place the pry bar under the lower control arm near the ball joint. Make sure the pry bar tip rests against the ball joint’s edge. Avoid placing it on rubber boots or seals. Position the handle so you can apply leverage smoothly. This setup allows you to test the joint’s movement without slipping.
Applying Pressure To Check Movement
Slowly push the pry bar upward or downward to move the control arm. Watch for any play or looseness in the ball joint. Small, tight movement means the joint is likely in good condition. Large or jerky movement suggests wear or damage. Test both sides for comparison to detect unusual differences.
Signs Of Worn Ball Joints
Worn ball joints cause problems in your vehicle’s suspension system. These joints connect the control arms to the steering knuckles. Over time, they wear out and affect driving safety and comfort. Knowing the signs of worn ball joints helps you spot issues early. This allows timely repairs and prevents accidents.
Noticing Excessive Play
Excessive play means the ball joint moves more than it should. This looseness affects wheel alignment and steering control. You may feel the steering wheel wobble or shake on rough roads. Using a pry bar to check ball joints can reveal this extra movement. If the joint shifts too much, it likely needs replacement.
Detecting Unusual Noises
Unusual noises come from worn ball joints during driving. These sounds include clunks, knocks, or squeaks. They become louder when turning or going over bumps. The noise results from metal parts rubbing due to looseness. Hearing these sounds is a clear sign the ball joints are failing.

Credit: www.reddit.com
Safety Tips During Inspection
Inspecting ball joints with a pry bar requires more than just the right tools and technique. Your safety should be the top priority throughout the process. Taking precautions can prevent injuries and ensure your vehicle stays secure while you work.
Avoiding Injury Risks
Always wear safety glasses to protect your eyes from debris or sudden movements of parts. Gloves can provide a better grip on the pry bar and shield your hands from sharp edges or pinch points. Avoid placing your fingers near the joint’s pivot area to reduce the chance of getting pinched or crushed.
Think about the force you’ll apply with the pry bar. If too much pressure is used, the tool could slip or the joint could suddenly break free, causing harm. Use steady, controlled movements and never rush the inspection.
Ensuring Vehicle Stability
Before you start, make sure your vehicle is parked on a flat, solid surface. Engage the parking brake firmly and use wheel chocks to block the wheels opposite the side you’re inspecting. This keeps the vehicle from rolling unexpectedly.
Supporting the vehicle with sturdy jack stands is crucial if you need to lift it. Relying only on a jack is risky because jacks can fail or shift. Have you ever felt the sudden jolt of a slipping car? That experience teaches the value of stable support.
When To Replace Ball Joints
Knowing when to replace your ball joints is crucial for keeping your vehicle safe and running smoothly. Ignoring worn ball joints can lead to uneven tire wear, poor handling, and even dangerous steering failures. Paying attention to signs and knowing the right time to act can save you time, money, and stress on the road.
Recognizing Critical Damage
Ball joints wear out over time, but not all wear requires immediate replacement. Look for symptoms like clunking noises when turning, excessive vibration in the steering wheel, or uneven tire wear patterns. If you notice your vehicle pulling to one side or if the front end feels loose, these are red flags.
Visual inspection can also reveal damage. Check for torn or missing rubber boots around the ball joint, as dirt and moisture entering the joint accelerate wear. If you see rust or excessive movement when prying the joint, it’s a clear sign the ball joint is compromised.
Consulting A Professional Mechanic
Sometimes, it’s hard to tell if a ball joint needs replacement just by looking or listening. A professional mechanic can provide an accurate diagnosis through a thorough inspection and test drive. They have the tools and experience to detect subtle signs of failure that you might miss.
Don’t hesitate to ask your mechanic for advice if you’re unsure. Getting expert input can prevent unnecessary repairs or help you avoid dangerous situations. Have you ever ignored a noise only to find out it was a serious issue later? Trusting a pro early can save you headaches down the line.

Credit: www.reddit.com

Credit: www.reddit.com
Frequently Asked Questions
How Do You Check Ball Joints With A Pry Bar?
To check ball joints, place the pry bar under the tire and lift. Watch for excessive movement or play. If the joint moves too much, it may be worn and need replacement.
What Are Signs Of Bad Ball Joints?
Signs include clunking noises, uneven tire wear, and loose steering. These symptoms indicate ball joints may be failing and require inspection using a pry bar.
How Often Should Ball Joints Be Inspected?
Ball joints should be inspected every 12,000 miles or during regular maintenance. Frequent checks help catch wear early, ensuring vehicle safety and preventing costly repairs.
Can A Pry Bar Damage Ball Joints?
When used carefully, a pry bar won’t damage ball joints. Gentle leverage helps detect movement without harming components. Avoid excessive force to prevent damage.
Conclusion
Checking ball joints with a pry bar helps keep your vehicle safe. It shows if parts move too much or are loose. Early checks can stop big problems later. Use simple tools and take your time. Regular inspections protect your car and your wallet.
Stay safe on the road by knowing how to check ball joints yourself. It’s easier than you think. Give it a try and keep your ride smooth.

Automotive Specialist & Expert Writer
Tyler Kingston is a passionate automotive writer with a wealth of knowledge in all things cars. With years of experience in the automotive industry, Tyler specializes in everything from vehicle maintenance to the latest car technologies and innovations. He is known for his ability to break down complex automotive concepts into easily digestible, engaging content for both novice and experienced car enthusiasts. Whether it’s detailing car repair techniques, reviewing new car models, or diving into the world of auto accessories, Tyler’s articles provide valuable insights to readers. His hands-on experience, combined with a genuine love for cars, allows him to deliver expert advice, tips, and news that keeps readers coming back for more.