How to Change Cabin Air Filter Subaru Forester?
Imagine driving down a scenic road, the breeze from outside weaving through your Subaru Forester, creating the perfect harmony between man and machine. But suddenly, you notice a musty smell and the air isn’t as fresh as it used to be.
This is a telltale sign that your cabin air filter needs changing. You might think it’s a daunting task, but in reality, it’s a simple maintenance job that can make a world of difference in your driving experience. By understanding how to change your cabin air filter, you can ensure that every drive is as refreshing as the first.
Not only will you breathe cleaner air, but you’ll also enhance the efficiency of your car’s ventilation system. This article will guide you through each step with clear instructions, helping you save money and time. Dive in to discover how easy it is to improve the air quality in your vehicle and boost your comfort on the road.
Tools And Materials Needed
Changing the cabin air filter in a Subaru Forester requires a new filter and basic tools. A screwdriver and gloves will help remove the glove box safely. Keep a clean cloth handy to wipe away dust.
Changing the cabin air filter in your Subaru Forester is a simple task that can enhance your driving experience. With the right tools and materials, you can ensure cleaner air inside your vehicle. Let’s dive into what you’ll need to make this maintenance task smooth and efficient.
Basic Tools You’ll Need
To replace the cabin air filter, you’ll need a screwdriver. A Phillips head is typically best for this job. It’s essential to have a compact one, as the workspace can be tight. Another handy tool is a pair of pliers. They might come in useful if you need to pull out stubborn clips or debris.
Materials For A Smooth Replacement
The most crucial material is the cabin air filter itself. Make sure to buy one that specifically fits your Subaru Forester model. Check your owner’s manual for the exact specifications. Consider having a small vacuum or a dust rag on hand. You might find dust and debris in the filter compartment that needs cleaning.
Organizing Your Workspace
Clear out the glove compartment area. You’ll need space to maneuver, so remove any items stored inside. Lay down a mat or towel to protect the car’s interior from any dirt or dust that may fall during the process.
Safety Gear To Consider
Though changing a cabin air filter is straightforward, wearing gloves can keep your hands clean. It’s surprising how much dust can accumulate in the filter area. A face mask might be a good idea if you’re sensitive to dust. You want to breathe clean air, not the remnants of the old filter. — Have you checked your cabin air filter recently? With just a few tools and materials, you can tackle this task with confidence. Whether you’re a seasoned car enthusiast or a beginner, preparing your tools and workspace effectively can make a world of difference in your DIY experience.
Locating The Cabin Air Filter
Finding the cabin air filter in a Subaru Forester is simple. Open the glove box and remove the screws. Look behind for the filter housing.
Locating the cabin air filter in your Subaru Forester might seem daunting at first. However, with a bit of guidance and patience, you’ll find it’s easier than you think. This simple task can improve the air quality in your vehicle, making your driving experience more enjoyable.
Understanding Your Vehicle’s Layout
Begin by familiarizing yourself with your Subaru Forester’s interior. The cabin air filter is usually hidden behind the glove compartment. This spot is crucial as it filters the air that comes through your vehicle’s ventilation system.
Accessing The Glove Compartment
Open the glove compartment and empty it out. This step is essential to ensure nothing gets in your way. Gently press the sides of the compartment to release it from its position.
Identifying The Filter Housing
Once the glove compartment is lowered, you’ll spot a rectangular cover behind it. This cover protects the cabin air filter. Look for tabs or clips on the cover, and push or unclip them carefully.
Spotting The Filter
Behind the cover, you’ll see the filter nestled snugly inside. It might be dusty or grimy, especially if it hasn’t been changed in a while. Notice how it’s positioned before removing it; this will help you install the new one correctly.
Checking For Obstructions
Before installing a new filter, make sure no debris or leaves have accumulated in the filter housing. This step ensures that nothing blocks the airflow or damages the new filter. Changing your cabin air filter can make a world of difference. Have you ever noticed how fresh air can change your mood? This simple maintenance task can keep that freshness flowing every time you drive. Give it a try and see how it transforms your driving experience.
Removing The Glove Box
To change the cabin air filter in a Subaru Forester, start by removing the glove box. This step provides easy access to the filter compartment, ensuring a smooth replacement process.
Changing the cabin air filter in your Subaru Forester is a straightforward task that can enhance your driving experience by providing cleaner air. One of the initial steps in this process is removing the glove box. This might seem daunting, but with a bit of guidance, it can be quite simple. Ready to roll up your sleeves and get started? Let’s dive into the details.
Detach Support Arm
First, locate the support arm on the side of the glove box. It’s a small rod that helps keep the glove box secure. Gently pull this arm away to detach it from its hook. You might need to give it a slight wiggle, but don’t force it. Have you ever found yourself struggling with something that seemed so simple? This is one of those times where patience pays off.
Release Glove Box Stops
Once the support arm is detached, it’s time to release the glove box stops. These stops prevent the glove box from opening too far and spilling its contents. Press on each side of the glove box to push in the stops. This will allow the glove box to drop down completely, giving you access to the cabin air filter. If you’ve ever had a drawer jam because it was overfilled, you know the importance of having a smooth mechanism. Now, you’re ready to swap out the old filter. Making these small steps can lead to a big improvement in your car’s air quality. Isn’t it amazing how something so simple can make such a difference? As you tackle this task, remember that each car model may have slight variations, but the essence remains the same. Have you tried this before? How did it go?

Credit: www.ifixit.com
Accessing The Filter Compartment
Accessing the filter compartment in a Subaru Forester is simple. Open the glove box and locate the screws on its sides. Remove these screws to access the cabin air filter easily.
Accessing the cabin air filter compartment in your Subaru Forester is a straightforward task that can save you time and money. Whether you’re a seasoned DIY enthusiast or a beginner, gaining access to the filter compartment doesn’t require special tools or expertise. In this guide, you’ll learn how to locate and open the filter compartment, and remove the old filter with ease. Are you ready to breathe cleaner air in your vehicle? Let’s get started.
Open Filter Compartment
Begin by locating the glove box in your Subaru Forester. This is where the cabin air filter compartment is typically housed. Open the glove box and clear out any contents that might obstruct your access to the filter compartment. Once the glove box is empty, gently press in on the sides to release the glove box stoppers. This will allow the glove box to swing down further and reveal the filter compartment door. Be careful not to apply too much force to avoid damaging the glove box or its stoppers. With the glove box out of the way, you’ll see the filter compartment door. It’s usually secured by tabs or screws. If yours has tabs, simply press them to open the door. If there are screws, a small screwdriver will do the trick. Opening this door grants you direct access to the cabin air filter.
Take Out Old Filter
With the filter compartment door open, you’ll be able to see the old air filter. It might be snugly fitted, but a gentle pull should release it. Notice the dirt and debris trapped in the old filter. Imagine the improved air quality you’ll enjoy with a new filter in place! Before removing the old filter completely, pay attention to how it’s oriented. Many filters have arrows indicating airflow direction. This is crucial information for installing the new filter correctly. Carefully slide out the old filter, ensuring no debris falls into the compartment. If you have a vacuum handy, consider giving the compartment a quick clean to remove any accumulated dust. This step ensures your new filter starts its job in the best possible condition. By following these steps, accessing your Subaru Forester’s cabin air filter compartment becomes a manageable task. Is there a specific tip or trick you use to make this process even smoother? Share your thoughts and experiences in the comments!
Installing The New Cabin Air Filter
Installing the new cabin air filter in your Subaru Forester is a straightforward task. This process ensures clean air circulates inside your vehicle. A fresh filter improves air quality and enhances your driving experience. Follow these simple steps to install the new filter correctly.
Position The New Filter
Take the new cabin air filter out of its packaging. Check it for any damage before installation. Locate the filter compartment behind the glove box. Slide the new filter into the designated slot gently. Make sure it aligns properly with the airflow direction. Incorrect positioning can affect performance.
Close Filter Compartment
Once the filter is in place, secure the compartment. Ensure the cover fits snugly without gaps. Check that the compartment latch clicks into place. This prevents the filter from moving during drives. A properly closed compartment keeps the filter in position. Now, enjoy cleaner air inside your Subaru Forester.

Credit: www.ifixit.com
Reattaching The Glove Box
Secure the glove box back after changing the cabin air filter in a Subaru Forester. Align hinges, push gently to snap it into place, ensuring smooth operation and safety.
Reattaching the glove box in your Subaru Forester might seem like a small step, but it’s crucial for ensuring everything fits snugly and functions perfectly. Just like putting the final piece in a puzzle, this step will give you the satisfaction of a job well done. Let’s break it down so you can confidently complete this task without any hiccups.
Reinstall Support Arm
The support arm is what keeps your glove box from flopping down or shutting too quickly. Begin by locating the small hook or latch on the side of the glove box. Slide the support arm back into place. You might need to apply a bit of pressure to ensure it clicks securely. Think of it as a safety harness for your glove box, keeping everything steady and secure. Have you ever fumbled with a glove box that wouldn’t stay open? This step ensures you won’t have to deal with that annoyance.
Secure Glove Box Stops
The stops prevent your glove box from opening too far and spilling its contents. Align the stops with the designated slots on either side of the glove box. Push them gently until you hear a satisfying click. This is your cue that they’re locked in place. Imagine the peace of mind knowing your glove box will never unexpectedly dump your belongings onto the floor again. Reattaching the glove box might seem like a small detail, but these steps ensure it operates smoothly and securely. Have you ever overlooked a small step only to face bigger issues later? Paying attention to these details can save you from future frustrations.
Tips For Maintenance
Changing the cabin air filter in a Subaru Forester ensures fresh air inside your car. Locate the filter behind the glove box. Replace it every 15,000 miles or once a year for optimal performance.
Maintaining your Subaru Forester’s cabin air filter is crucial for ensuring a clean and fresh interior environment. Regular upkeep can extend the life of your air filter and keep your vehicle smelling pleasant. Implementing a few practical tips can make a significant difference in how effectively your air filter performs.
Inspect Regularly
Check the cabin air filter every six months or whenever you notice a decrease in air quality. It might surprise you how quickly dust and debris accumulate. Use a flashlight to look for clogs or discoloration without removing the filter.
Replace Timely
A good rule of thumb is to replace the cabin air filter every 12,000 to 15,000 miles. If you drive in a dusty environment, consider changing it sooner. Keep a spare filter handy in your garage to make the swap easier when the time comes.
Keep Your Car Clean
A clean interior can prolong the life of your air filter. Regularly vacuum your car and wipe down surfaces to minimize the dust that gets circulated. You’d be amazed at how much a simple cleaning can reduce the load on your air filter.
Check For Odors
If you notice any musty smells, it’s a sign your filter might need attention. Use an odor neutralizer spray occasionally to freshen up the system. This can also help you assess whether it’s the filter causing the odor or something else.
Diy Replacement
Replacing the cabin air filter in a Subaru Forester is a task you can handle yourself. Follow the user manual or watch a quick online tutorial for guidance. It’s a simple process that requires minimal tools and can save you a trip to the mechanic.
Invest In Quality Filters
When buying a replacement, opt for higher quality filters that offer better filtration and durability. Spending a little extra now can save you money and hassle in the long run. Consider filters with activated carbon for better odor control.
Stay Informed
Stay updated with any recalls or service bulletins related to your Forester’s air filtration system. You might be eligible for a free replacement if there’s a known issue. This proactive approach can help you avoid unexpected problems down the road. How often do you think about your cabin air filter? It’s one of those small yet impactful components that can make your driving experience much more pleasant. Implementing these tips will ensure you breathe easy every time you hit the road.
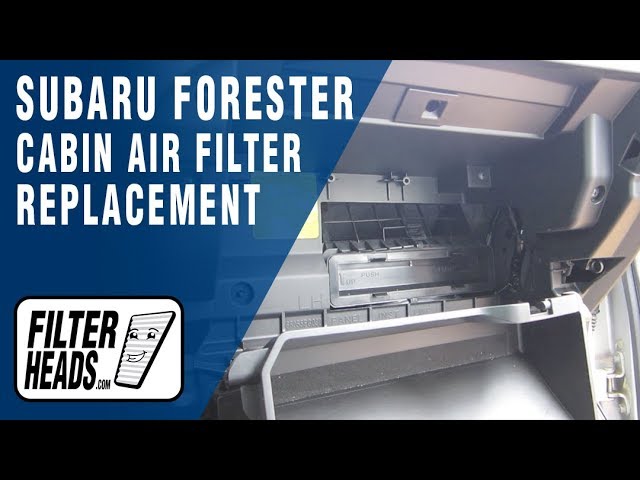
Credit: www.youtube.com
Frequently Asked Questions
How Often Should You Replace The Cabin Air Filter On A Subaru Forester?
Replace the cabin air filter on a Subaru Forester every 15,000 to 30,000 miles. Check the owner’s manual for specific guidance. Regular replacement ensures clean air quality and optimal HVAC performance. Adjust frequency based on driving conditions and environment. Consider earlier replacement in dusty or polluted areas.
Can I Replace My Cabin Air Filter Myself?
Yes, you can replace your cabin air filter yourself. It’s a simple task requiring basic tools. Check your vehicle’s manual for guidance. Regular replacement ensures clean air inside your car and maintains efficient HVAC performance. Save money by doing it yourself instead of visiting a mechanic.
Can A Dirty Cabin Filter Affect Ac?
Yes, a dirty cabin filter can reduce airflow in your AC. It causes the system to work harder, reducing efficiency and cooling performance. Regularly replacing the cabin filter ensures optimal AC function and improves air quality inside your vehicle.
What Is The Most Common Problem With The Subaru Forester?
The Subaru Forester often faces issues with excessive oil consumption. This problem can lead to engine damage if unchecked. Regular oil level monitoring and maintenance are crucial to prevent complications. Addressing this early ensures a longer lifespan for the vehicle’s engine.
Conclusion
Changing your Subaru Forester’s cabin air filter is easy. It enhances air quality inside your vehicle. Regular replacement ensures a fresher, healthier environment. Follow the steps carefully for a smooth process. No special tools needed. Just patience and a few minutes.
A clean filter improves airflow and efficiency. Remember to check your manual for specifics. Stay proactive with your car’s maintenance. Enjoy the comfort of clean air on every drive. Keep your Forester running smoothly with simple care.

Automotive Specialist & Expert Mechanic
Noah Brooks is a skilled automotive expert with a passion for both the technical and creative aspects of the automotive world. With years of experience in repairing, restoring, and enhancing vehicles, Noah is known for his deep knowledge of car mechanics, parts, and accessories. His expertise extends to welding, troubleshooting, and offering advice on the latest car technologies and trends. Whether it’s diagnosing complex issues or guiding readers through DIY car repairs, Noah’s blog posts are filled with hands-on insights that appeal to both novice and experienced car enthusiasts. When he’s not writing, Noah is working on his own car projects, continually learning and sharing his automotive passion with the world.