How to Clean Headlights Lens: Ultimate DIY Guide
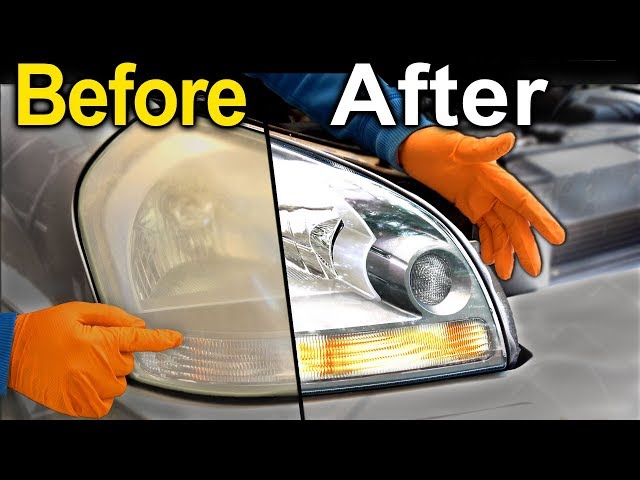
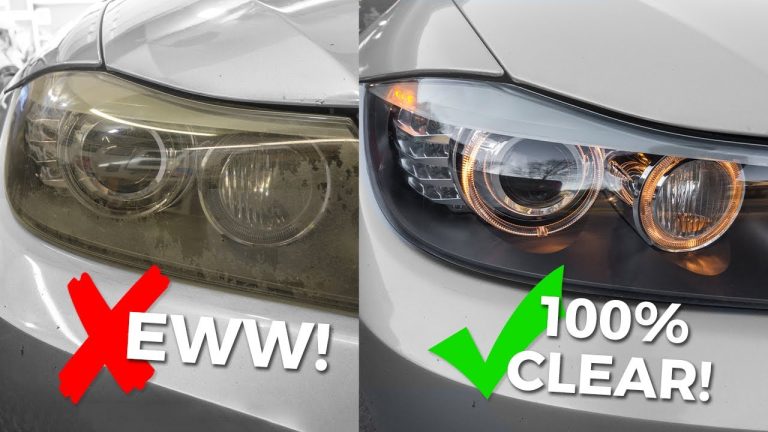
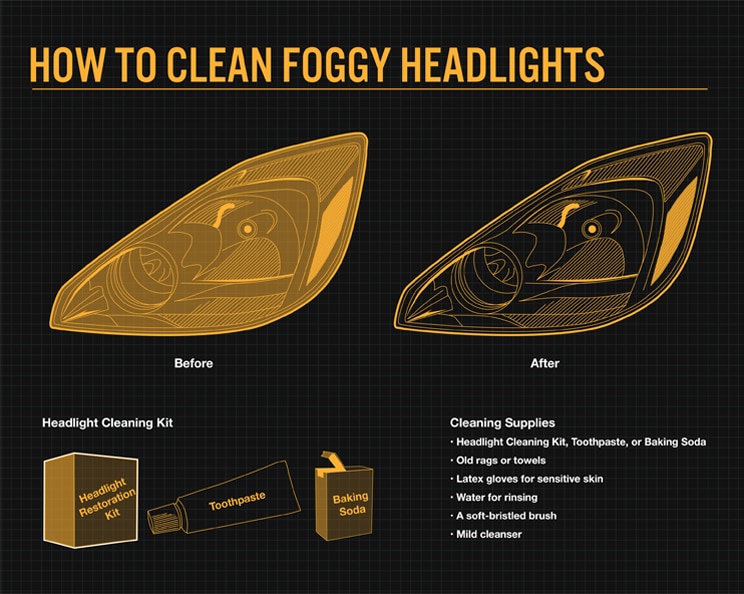
Are your car’s headlights looking dull and cloudy? Over time, the lenses can become foggy, reducing your visibility and making nighttime driving hazardous.
But here’s the good news: you don’t need to spend a fortune on replacements. You can restore their clarity with some simple cleaning tricks. Imagine driving with crystal-clear headlights, enhancing not just your safety but also the overall aesthetic of your vehicle.
In this guide, you’ll discover easy, effective methods to clean your headlights, giving them a like-new shine. Get ready to turn back the clock on your headlights and bring back that bright, clear illumination you miss. Your car—and your nighttime vision—will thank you. Dive in to learn how you can make this transformation happen today!
Materials Needed
Gather a microfiber cloth, mild soap, water, and baking soda. Use toothpaste for extra shine. Don’t forget a soft brush.
Cleaning your car headlights can make a significant difference in your driving experience. Properly cleaned headlights ensure better visibility and contribute to the overall aesthetic of your vehicle. Before you dive into the cleaning process, you need to gather the right materials to ensure effective results. You might be surprised at how simple and accessible these items are.
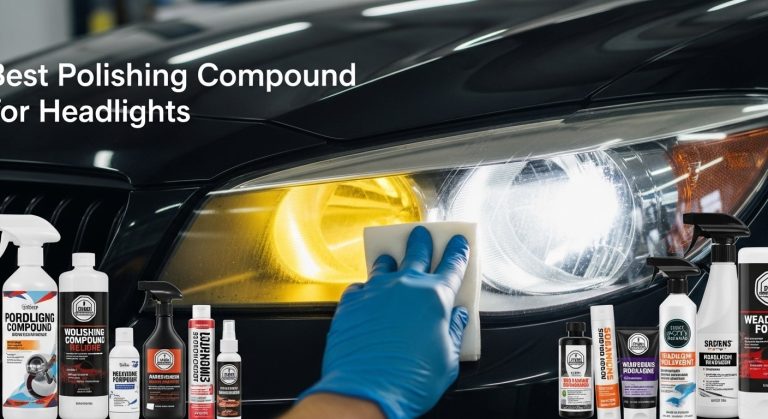
Cleaning Solution
Choosing the right cleaning solution is crucial. You can use a commercial headlight cleaning product or make a DIY mixture. A common homemade option is a blend of baking soda and vinegar. This combo works wonders in removing grime and cloudiness.
Microfiber Cloths
Microfiber cloths are essential for gentle yet effective cleaning. Unlike regular towels, they won’t scratch the surface of your headlights. These cloths are perfect for applying the cleaning solution and buffing the lens to a crystal-clear finish.
Sandpaper
If your headlights are severely oxidized, sandpaper might be necessary. Start with a higher grit, like 1000, and gradually move to finer grits like 2000. Sandpaper helps remove the top layer of oxidation, revealing a clearer surface underneath.
Masking Tape
Masking tape protects your car’s paint around the headlights during the cleaning process. You don’t want to accidentally damage the paint while scrubbing or sanding. It’s a small step that saves you from potential frustration.
Water Bucket
A bucket of water is vital for rinsing your headlights and sandpaper. You’ll frequently dip your sandpaper to keep it wet, ensuring a smoother sanding process. Clean water also helps to wash away residual cleaning solution and debris.
Uv Sealant
After cleaning, applying a UV sealant preserves your hard work. This sealant acts like sunscreen for your headlights, preventing future oxidation. Without it, your headlights might cloud up again quickly, undoing your cleaning efforts. Gathering these materials is the first step in reclaiming the brightness of your headlights. Have you ever struggled with cloudy headlights? What other items would you consider essential for this task?
Credit: valleycollision.com
Preparing The Vehicle
Cleaning your headlights is essential for clear visibility. Before starting, prepare your vehicle properly. This ensures safety and efficiency throughout the process.
Park In A Safe Area
First, choose a safe location to park your vehicle. A flat surface is ideal. Avoid busy streets and crowded areas. Ensure enough space around your car. This prevents accidents and provides room to move freely.
Gathering Supplies
Next, gather all necessary cleaning supplies. You need a headlight cleaning kit. A microfiber cloth is essential. Ensure you have water and soap. A bucket will be useful. You might need sandpaper for tough grime. Collect all items before you begin. This saves time and avoids interruptions.
Cleaning With Soap And Water
Cleaning your headlights with soap and water is a simple, yet effective method to restore their shine. If your headlights have started to look cloudy, a good wash with a basic solution can make a noticeable difference. This approach is gentle, safe, and something you can easily do at home without much hassle.
Mixing The Solution
Start with a basic household liquid soap. A few drops in a bucket of warm water will do the trick. You don’t need any special automotive soap; your regular dish soap is perfect. Make sure the solution is well mixed to avoid any soap residue on the headlights.
Wondering about the right proportion? Aim for a light sudsy mix. Too much soap can leave streaks, and too little might not clean effectively. Try using about a tablespoon of soap for every gallon of water.
Applying The Mixture
Once your solution is ready, grab a soft sponge or cloth. Dip it into the mix and gently wipe the headlight lens. Use circular motions to cover the entire surface. This technique helps to lift dirt and grime without scratching the lens.
Are you seeing stubborn spots? Don’t worry. Let the soap and water sit for a minute or two before wiping it again. You may need to rinse and repeat if the headlights are particularly dirty.
Remember to rinse thoroughly with clean water afterward. This prevents soap scum and ensures your headlights are crystal clear. Have you tried this method before? You might find it surprisingly effective and satisfying.
Credit: www.bridgestonetire.com
Using Baking Soda And Vinegar
Cleaning headlights with baking soda and vinegar is simple. Mix baking soda with vinegar to form a paste. Gently rub this mixture on the headlights using a soft cloth. Wipe clean with water for bright, clear lenses.
Cleaning your car’s headlights can seem daunting. Yet, using baking soda and vinegar makes it simple. This method is effective and budget-friendly. It helps restore the clear appearance of your headlights. Let’s delve into the process.
Creating The Paste
Start with a small bowl. Add two tablespoons of baking soda. Pour in a small amount of vinegar. The mixture will fizz briefly. Stir until you achieve a thick paste. This paste will clean and polish your headlights. Ensure the paste is not too runny. Adjust the amount of baking soda or vinegar as needed.
Rubbing The Paste On Lenses
Apply the paste to the headlights. Use a clean, soft cloth for this. Rub the paste in circular motions. Focus on the cloudy areas. This helps remove dirt and grime. Be gentle to avoid scratching the lens. Rinse the headlights with water after rubbing. Dry them with a microfiber cloth. This process should restore their shine. Repeat if necessary for stubborn spots.
Polishing With Toothpaste
Polishing headlights with toothpaste is an effective DIY method. It can help restore clarity to foggy lenses. This technique is budget-friendly and easy for beginners. Toothpaste’s mild abrasive properties make it an ideal cleaning agent.
Choosing The Right Toothpaste
Not every toothpaste works well for polishing headlights. Select a non-gel toothpaste for best results. This type usually contains mild abrasives. Whitening toothpaste often has stronger abrasives. They can be more effective for cleaning. Avoid toothpaste with colored gels or beads. They might scratch the lens surface.
Applying Toothpaste On Headlights
Start by cleaning the headlights with water. Dry them thoroughly with a cloth. Apply a generous amount of toothpaste to a soft cloth. Rub the toothpaste onto the lens in circular motions. This helps remove grime and dirt. Continue rubbing for a few minutes. Rinse with water and wipe dry. Repeat if necessary for stubborn spots.
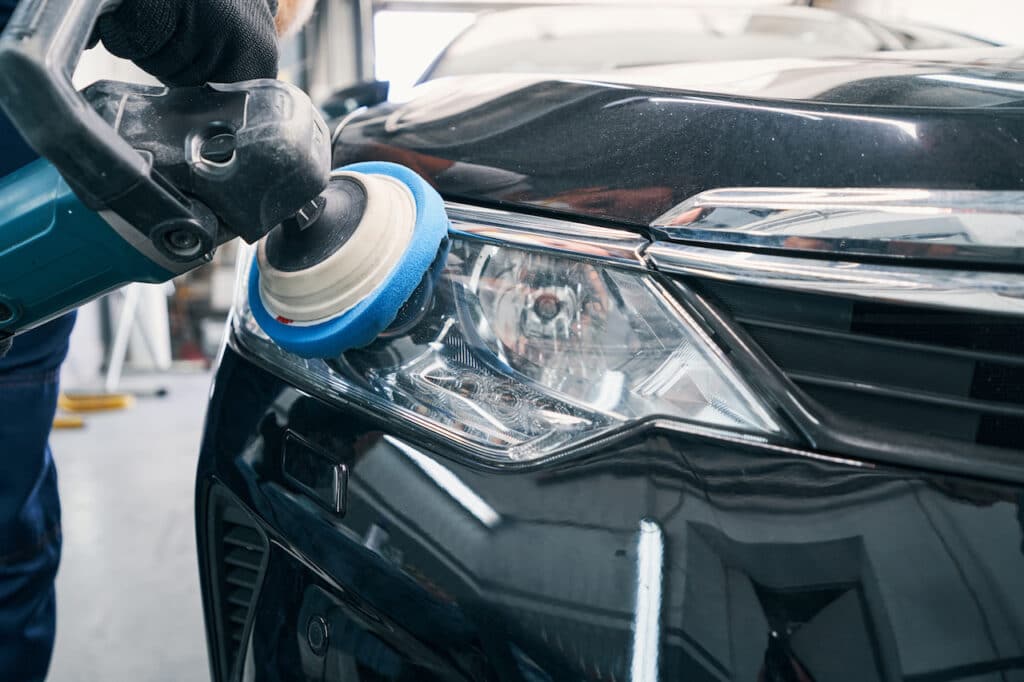
Protecting With Wax Or Sealant
Preserve the clarity of your headlights by applying wax or sealant after cleaning. This protective layer shields against dirt and UV damage. Regular maintenance ensures long-lasting brightness and safety on the road.
Cleaning your headlights is a crucial step to ensure clear visibility on the road. But cleaning is just half the battle. Have you ever cleaned your headlights, only to find them cloudy again in a few weeks? Protecting them with a wax or sealant can keep them clearer for longer. This protective layer acts as a barrier against dirt, UV rays, and other environmental factors. Let’s dive into how you can effectively choose and apply these products to maintain your headlights’ shine.
Selecting The Product
Choosing the right wax or sealant can make all the difference. Look for products specifically designed for headlights. These will often mention UV protection, which is crucial in preventing yellowing. Check reviews and ratings online. Others’ experiences can guide you towards the best options. You might even find a product that surprises you with its effectiveness. Consider the ease of use. Some products require more elbow grease than others. If you have limited time, a spray-on sealant might be the better choice.
Application Process
Before you start, ensure your headlights are thoroughly cleaned and dry. This ensures the wax or sealant adheres properly. Apply the product according to the instructions. Typically, you’ll use a microfiber cloth to spread it evenly. Allow it to cure. This might take a few minutes or longer, depending on the product. Once it’s set, buff the surface gently for a clear, polished look. Think about your routine. How often will you reapply the wax or sealant? Set a reminder if needed, so your headlights stay clear and bright. Have you ever skipped this protective step after cleaning? Try adding it to your routine and notice the difference. Your headlights will thank you.
Additional Tips And Tricks
For extra shine, consider using toothpaste as a mild abrasive to clean headlights. Apply with a soft cloth and rinse well. A coat of car wax afterward can help protect against future haze.
When it comes to cleaning your car’s headlights, there’s more to consider than just the basic steps. A few extra tips and tricks can make a significant difference in how clear and bright your headlights appear. By taking a proactive approach, you can maintain that fresh, new look for longer, ensuring safer and more pleasant nighttime driving. Ready to dive into some practical advice? Let’s get started.
Regular Maintenance
Regular care is essential for keeping headlights in top condition. Consider setting a monthly reminder to inspect your headlights for any dirt or cloudiness. A simple wipe down with a damp cloth can prevent buildup. You might be surprised at the difference a little bit of regular maintenance can make. A friend of mine was struggling with dim headlights until he started cleaning them monthly. Now, his headlights are always crystal clear, and he feels much safer driving at night.
Common Mistakes To Avoid
Avoid using harsh chemicals like ammonia-based cleaners, which can damage the plastic. Stick to products specifically designed for headlights or mild household cleaners. Don’t forget to rinse thoroughly after cleaning. Leaving residues can attract more dirt and cause cloudiness. Another common mistake is ignoring small cracks or chips. These can quickly become worse, so it’s best to address them immediately. A quick fix can save you a lot of hassle down the road. Do you often overlook these details? Paying attention to these small aspects can enhance not only the appearance but also the functionality of your headlights. Keeping these tips in mind, you can extend the life of your headlights and keep them shining brightly. What’s your next step towards clearer headlights?

Credit: www.youtube.com
When To Seek Professional Help
Cleaning headlights often refreshes their appearance. Yet, some situations demand expert intervention. Understanding when professional help is necessary ensures safety and avoids costly mistakes. Below are key reasons to consult a specialist.
Identifying Severe Damage
Headlights are essential for safe driving. Inspect them regularly. Look for deep scratches or cracks. These can cause light distortion. Water may seep inside, causing electrical issues. If you notice dimming or flickering, seek a professional. They have tools to assess and fix severe damage.
Cost Considerations
DIY methods are cheaper. But they might not fix serious problems. Professionals use advanced equipment. Their services cost more initially. Yet, they prevent future issues. This saves money long-term. Compare repair costs. Ensure you choose the best option for your budget.
Frequently Asked Questions
How To Clean Up Cloudy Headlight Lenses?
Clean headlights using toothpaste or baking soda. Apply with a soft cloth, scrub gently, and rinse well. Use a UV sealant for protection.
Will Wd-40 Clean Your Headlight Lens?
WD-40 can temporarily clean your headlight lens. It removes dirt and haze, improving visibility. For long-lasting results, consider using a dedicated headlight restoration kit. Regular maintenance ensures better clarity and safety on the road. Avoid relying solely on WD-40 for permanent headlight cleaning solutions.
How Do You Make Plastic Headlight Covers Clear Again?
Clean headlight covers with soapy water. Dry thoroughly. Apply toothpaste using a soft cloth, rubbing in circular motions. Rinse and dry. For better results, use a headlight restoration kit. Finish by applying a UV sealant to protect against future damage.
Regular maintenance keeps headlights clear and bright.
Will Magic Eraser Clean Headlight Lenses?
Yes, a magic eraser can clean headlight lenses. It removes oxidation and restores clarity. Rub gently to avoid scratches. Use water to help the process. Finish by applying a UV protectant to maintain results. Always test on a small area first.
Conclusion
Cleaning headlights can improve visibility and safety. Regular maintenance prevents buildup and fading. Use simple cleaning solutions like toothpaste or baking soda. These household items effectively restore clarity. After cleaning, apply a UV sealant. This protects against future damage and keeps lenses clear longer.
Clean headlights enhance your car’s appearance, too. Enjoy better night driving and a polished look. Keep your headlights bright with these easy steps. Regular care ensures long-lasting results. So, get started today and see the difference. Your car will thank you.

Automotive Specialist & Expert Mechanic
Noah Brooks is a skilled automotive expert with a passion for both the technical and creative aspects of the automotive world. With years of experience in repairing, restoring, and enhancing vehicles, Noah is known for his deep knowledge of car mechanics, parts, and accessories. His expertise extends to welding, troubleshooting, and offering advice on the latest car technologies and trends. Whether it’s diagnosing complex issues or guiding readers through DIY car repairs, Noah’s blog posts are filled with hands-on insights that appeal to both novice and experienced car enthusiasts. When he’s not writing, Noah is working on his own car projects, continually learning and sharing his automotive passion with the world.