Are Ball Joints Easy to Replace: Expert Tips for DIY Success
Are you wondering if replacing ball joints is something you can handle yourself? Knowing the answer could save you time, money, and a lot of frustration.
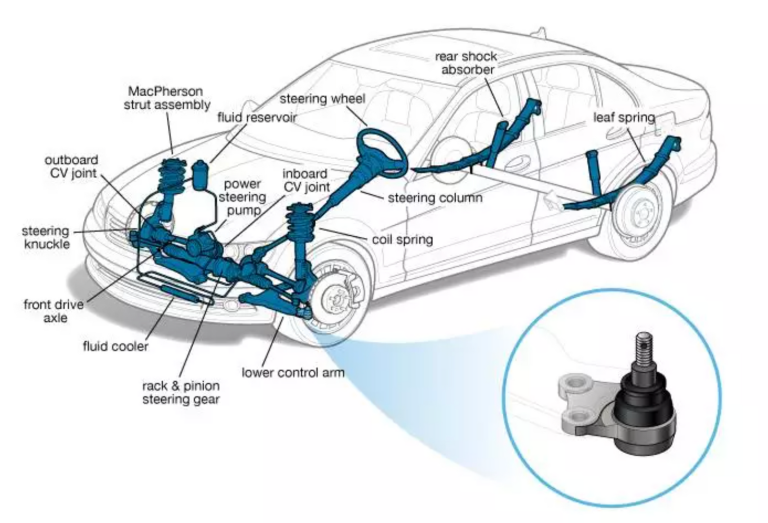
Ball joints are a crucial part of your vehicle’s suspension system, and when they wear out, it’s important to fix them properly. But is the job as tricky as it sounds? You’ll discover what ball joints do, how to tell if they need replacing, and whether you can tackle the repair on your own.
Keep reading—your car and your wallet will thank you.
Signs Of Worn Ball Joints
Recognizing the signs of worn ball joints early can save you from costly repairs and dangerous driving conditions. These small but crucial parts connect your car’s suspension to the wheels, and once they start to wear out, your vehicle’s performance and safety are at risk. Paying close attention to how your car feels and sounds can help you spot trouble before it becomes a serious issue.
Common Symptoms
You might notice unusual sounds like clunking or squeaking when turning or going over bumps. This noise often means the ball joint is loose or damaged.
Your steering could feel less responsive or a bit shaky, especially at low speeds. If your car pulls to one side without you touching the wheel, that’s another warning sign.
Uneven tire wear can also point to ball joint problems. If one side of your tires wears down faster, it means the suspension alignment is off, often due to worn ball joints.
Safety Risks
Ignoring worn ball joints puts you at risk of losing control of your vehicle. A failed ball joint can cause your wheel to collapse or detach from the suspension.
This can lead to dangerous accidents, especially at high speeds or during sharp turns. Have you ever thought about how a small part like this can impact your entire driving experience?
Replacing ball joints before they fail is a smart way to protect yourself and others on the road. Don’t wait until you hear a loud clunk or feel your car pulling unexpectedly—act as soon as you spot these signs.

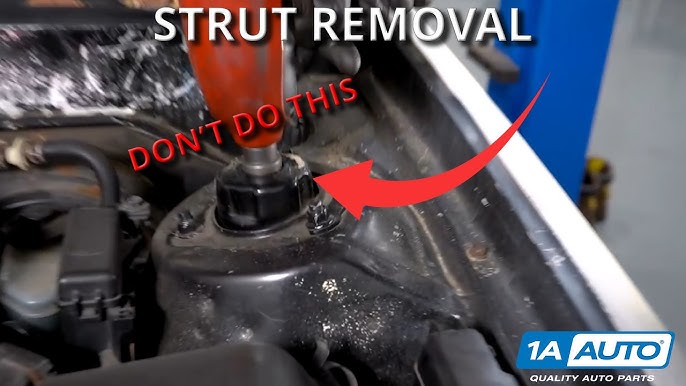
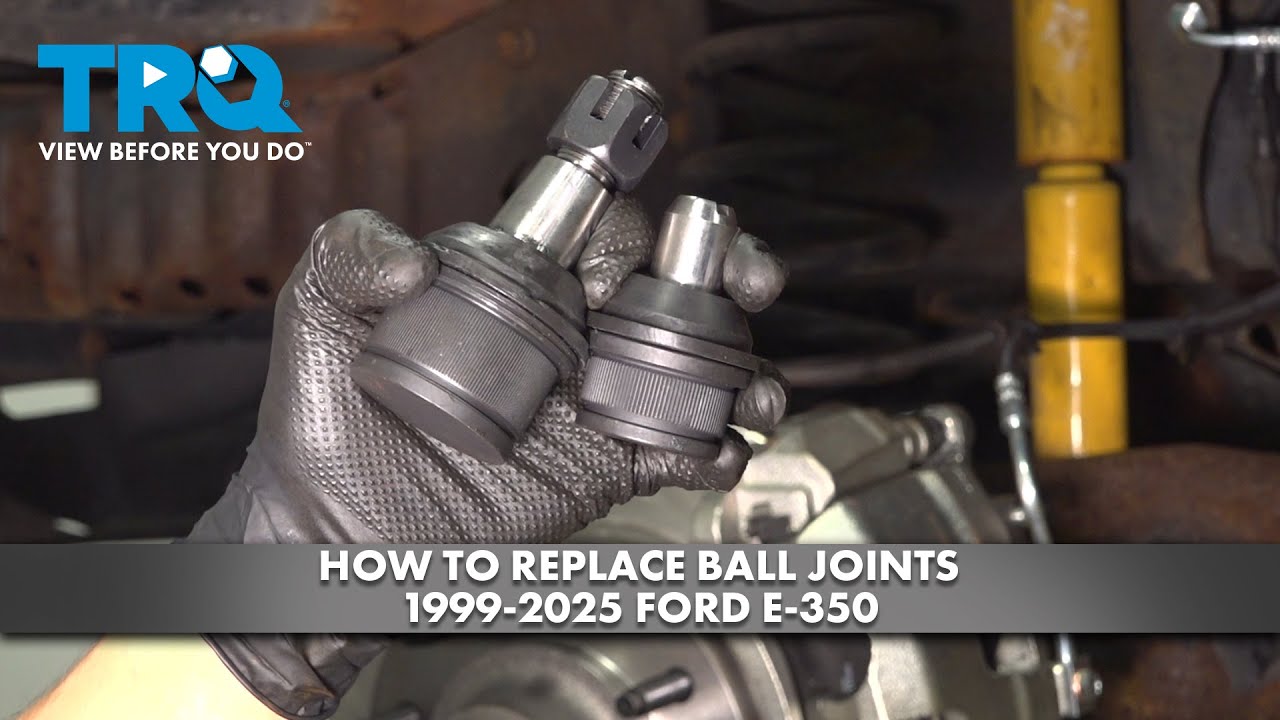
Credit: www.youtube.com
Tools You’ll Need
Basic tools include a wrench set, ball joint press, and a hammer. Safety gear like gloves and goggles is also important. Having the right tools makes the job easier and safer.
When replacing ball joints, the right tools make the task smoother. Having the correct tools ensures efficiency and safety during replacement. Below, we explore the essential and specialized tools needed for this job.Essential Hand Tools
Basic hand tools are crucial for ball joint replacement. These tools are often found in most toolboxes. They include:- Socket Set:A set with various sizes for different bolts.
- Wrench Set:Adjustable wrenches help with tight spaces.
- Hammer:Useful for loosening stubborn parts.
- Pliers:Needle-nose pliers for gripping small parts.
- Torque Wrench:Ensures bolts are tightened correctly.
Specialized Equipment
Some tools are specific to ball joint replacement. These tools might not be in a standard toolbox.- Ball Joint Press:Essential for pressing joints in and out.
- Pickle Fork:Separates ball joints from control arms.
- Jack and Jack Stands:Safely lift and support the vehicle.
- Ball Joint Separator:Removes ball joints without damage.
Preparing Your Vehicle
Before you dive into replacing your ball joints, getting your vehicle ready is crucial. Proper preparation not only makes the job easier but also keeps you safe throughout the process. Taking a few extra minutes to set up your workspace and vehicle can save you a lot of hassle later.
Safety Precautions
Safety should be your top priority. Make sure you wear protective gear like gloves and safety glasses. Loose clothing or jewelry can get caught in moving parts, so avoid wearing them.
Disconnect the battery to prevent any accidental electrical shorts or sparks. Double-check that the parking brake is engaged to keep your vehicle from rolling. These simple steps reduce risks and help you focus on the task.
Lifting And Securing
Properly lifting and securing your vehicle is essential before you start working underneath. Use a quality jack rated for your car’s weight and place it under the manufacturer-recommended lifting points.
Once lifted, immediately support the vehicle with sturdy jack stands—never rely on the jack alone. Check that the car is stable by gently shaking it; if it moves, reposition the stands. A stable vehicle means you can work confidently and safely on the ball joints.
Removing Old Ball Joints
Removing old ball joints can be a challenging task, especially if you haven’t done it before. It requires patience, the right tools, and a clear understanding of the process to avoid damaging surrounding components. Let’s break down what you need to know to get this job done smoothly.
Detaching Components
Start by safely lifting your vehicle and securing it with jack stands. Remove the wheel to access the suspension parts easily.
Next, you’ll need to detach components connected to the ball joint, such as the control arm and steering knuckle. Keep track of all bolts and nuts—losing even one can slow you down later.
Sometimes, using penetrating oil on rusty bolts can make detaching them easier. Have a breaker bar ready if you encounter tight fasteners.
Dealing With Stubborn Parts
Old ball joints often get stuck due to rust or corrosion. Simply pulling or prying might not be enough and can damage nearby parts.
Using a ball joint separator tool or a pickle fork can help release the joint without excessive force. If you don’t have these tools, carefully tapping with a hammer can loosen the connection.
Have you ever struggled with a part that just wouldn’t budge? Sometimes applying heat to the area softens rust, making removal easier—but be cautious around rubber boots and seals to avoid damage.
Installing New Ball Joints
Installing new ball joints is a crucial step in maintaining your vehicle’s suspension system. It requires attention to detail and the right tools to ensure your car drives smoothly and safely. Let’s look at key points that can make this process straightforward and effective.
Proper Alignment
Getting the alignment right is essential when installing new ball joints. Poor alignment can cause uneven tire wear and affect your steering response.
Start by positioning the ball joint exactly where the old one was. Check that it fits snugly without forcing it into place. Use a caliper or alignment tool to measure and verify that the ball joint is seated properly.
Have you ever noticed your car pulling to one side? That could be a sign of misaligned ball joints. Taking time here will save you from headaches later.
Securing Fasteners
Securing the fasteners tightly is just as important as proper alignment. Loose bolts can lead to dangerous driving conditions and premature wear on the new ball joints.
- Use a torque wrench to tighten fasteners to the manufacturer’s specifications.
- Double-check each bolt after the initial tightening to avoid any loosening during driving.
- Consider applying thread-locking compound to prevent bolts from vibrating loose over time.
When I replaced ball joints last year, I underestimated this step and had to redo it. Don’t make the same mistake—secure those fasteners firmly and correctly the first time.
Credit: www.d-series.org
Post-installation Checks
After replacing ball joints, checking their installation is vital. These checks ensure safety and smooth vehicle operation. Proper post-installation inspections help spot any issues early.
Testing Movement
Check the ball joint for any looseness or play. Grab the wheel and try to move it up and down. There should be no excessive movement or noise. Use a pry bar to gently test the joint’s flexibility. Smooth, firm movement means the joint is secure. Loose or stiff joints need rechecking or adjustment.
Wheel Alignment Tips
New ball joints can affect wheel alignment. Misalignment causes uneven tire wear and poor handling. After installation, get a professional alignment check. If doing it yourself, follow these tips:
- Ensure the vehicle is on a flat surface.
- Use alignment tools or gauges for accuracy.
- Adjust toe, camber, and caster angles as needed.
- Test drive to confirm the car tracks straight.
Proper alignment extends tire life and improves driving comfort.
Common Challenges And Solutions
Replacing ball joints can be tricky due to several common challenges. These issues often slow down the process or cause extra work. Understanding these challenges helps you prepare better and find practical solutions.
Some problems arise from the condition of the parts or the tools used. Others come from the tight spaces and fragile components around the ball joints. Knowing how to handle these helps make the job smoother and safer.
Rust And Corrosion Issues
Rust is a major obstacle when removing old ball joints. It makes bolts and parts stick together tightly. Sometimes, rust can damage the threads or weaken the metal.
To deal with rust:
- Apply penetrating oil and let it sit for 15-30 minutes.
- Use a wire brush to clean rust off bolts before removal.
- Heat the area carefully with a torch to loosen stuck parts.
- Replace severely rusted parts instead of forcing removal.
These steps reduce breakage risk and save time during replacement.
Avoiding Damage
Ball joints sit near many sensitive parts like control arms and brake lines. Wrong tools or force can cause costly damage. Protecting surrounding components is crucial.
Tips to avoid damage:
- Use the correct ball joint press tool or separator.
- Support suspension parts firmly to prevent stress.
- Work slowly and check for interference before applying force.
- Keep brake lines and sensors clear from the work area.
Careful handling keeps everything intact and ensures a clean replacement.
When To Seek Professional Help
Knowing when to call a professional for ball joint replacement can save you time, money, and potential safety risks. Some situations might look manageable at first, but they require specialized tools and expertise to fix properly. Recognizing these signs early helps you avoid bigger problems down the road.
Signs Of Severe Wear Or Damage
If you notice unusual noises like clunking or squeaking coming from your suspension, it’s a strong indicator the ball joints might be badly worn. Excessive play in the steering wheel or uneven tire wear also signals serious issues. These symptoms mean the ball joints are likely compromised, and a professional’s diagnostic skills are necessary to confirm and fix the problem safely.
Complex Suspension Systems
Modern vehicles often have intricate suspension setups that demand precise handling during repairs. If your car has an independent suspension or electronic steering controls, replacing ball joints isn’t as simple as it used to be. Professionals have the right equipment and knowledge to work on these systems without causing additional damage.
Lack Of Proper Tools And Experience
Ball joint replacement requires specialized tools like ball joint presses and torque wrenches. Without these, you risk improper installation or injury. If you haven’t worked on suspension components before, you might underestimate the difficulty and the risks involved, making professional help the safer choice.
Safety Concerns And Vehicle Handling
Your vehicle’s steering and stability depend heavily on properly functioning ball joints. Incorrect replacement can lead to poor handling or even accidents. If you feel unsure about your ability to restore the suspension’s integrity, it’s better to have a mechanic handle the job to protect your safety and others on the road.
Warranty And Liability Considerations
Do you want to maintain your vehicle’s warranty or avoid liability for mistakes? Many warranties require repairs to be done by certified technicians. Additionally, if you replace ball joints yourself and something goes wrong, you could be responsible for any damage or accidents that follow.

Credit: www.youtube.com
Frequently Asked Questions
Are Ball Joints Difficult To Replace By Beginners?
Ball joints can be moderately challenging for beginners. Proper tools and a service manual help. Patience and safety precautions are essential for a smooth replacement.
How Long Does It Take To Replace A Ball Joint?
Replacing a ball joint usually takes 1 to 2 hours. Time varies based on experience and vehicle type. Having the right tools speeds up the process.
What Tools Are Needed To Replace Ball Joints?
Common tools include a ball joint press, wrenches, sockets, and a hammer. A jack and jack stands are essential for safety. Specialized tools can simplify removal and installation.
Can I Drive With A Bad Ball Joint?
Driving with a bad ball joint is unsafe. It can cause steering issues and uneven tire wear. Immediate replacement is recommended to avoid accidents.
Conclusion
Replacing ball joints takes some tools and patience. It is not very hard but needs care. You must follow steps and check your work. Safety matters most while working on your car. Knowing your skills helps decide if you do it or call a mechanic.
With the right guide, many find it doable. Keep your vehicle safe by fixing worn parts quickly. Simple tasks can save money and keep your ride smooth. Ball joints may seem tricky, but with focus, you can manage the job.

Automotive Specialist & Expert Writer
Tyler Kingston is a passionate automotive writer with a wealth of knowledge in all things cars. With years of experience in the automotive industry, Tyler specializes in everything from vehicle maintenance to the latest car technologies and innovations. He is known for his ability to break down complex automotive concepts into easily digestible, engaging content for both novice and experienced car enthusiasts. Whether it’s detailing car repair techniques, reviewing new car models, or diving into the world of auto accessories, Tyler’s articles provide valuable insights to readers. His hands-on experience, combined with a genuine love for cars, allows him to deliver expert advice, tips, and news that keeps readers coming back for more.