How to Adjust Floats on a Holley Carburetor: Expert Tips
Are you experiencing issues with your engine’s performance? A misadjusted float on your Holley carburetor might be the culprit.
This small but crucial component plays a vital role in regulating the fuel flow, ensuring your vehicle runs smoothly. If you’re not familiar with the process of adjusting floats, don’t worry—this guide is here to help you. By learning how to adjust the floats correctly, you can enhance your vehicle’s efficiency and prevent costly repairs down the line.
Ready to transform your driving experience? Let’s dive in and explore the step-by-step process that will empower you to take control of your engine’s performance.
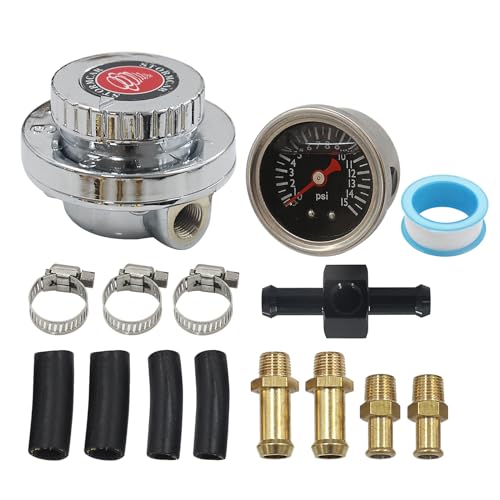
Tools And Materials Needed
Adjusting the floats on a Holley carburetor requires specific tools. Having the right materials ensures accuracy and efficiency. Proper preparation prevents frustration during the adjustment process. This guide will detail the essential tools and materials needed.
Tools Required
A flathead screwdriver is a primary tool for this task. It helps with loosening the screws on the float bowl. A small wrench is also necessary. You’ll use it to adjust the float level. Choose a wrench that fits snugly to avoid stripping screws. A socket set can be handy too. It allows for easy removal of the float bowl screws.
Materials Needed
Replacement gaskets are crucial if the current ones are worn. They ensure a tight seal after adjustments. Keep a clean rag or towel nearby. It helps in wiping off any fuel spills. Safety goggles are important for eye protection. Working with fuel can be risky without them. Finally, have a flashlight ready. It aids visibility in tight or dim areas.
Safety Gear
Always wear gloves when working with carburetors. They protect your hands from fuel and grime. Choose gloves that offer a good grip. This helps in handling small parts with ease. A fire extinguisher should be nearby as a precaution. Safety first, always.
Safety Precautions
Adjusting floats on a Holley carburetor requires precision and care. Before diving into the task, understanding safety precautions is crucial. Protecting yourself and ensuring a secure working environment is key. Here’s a guide to keep you safe while working on your carburetor.
Wear Proper Protective Gear
Safety goggles shield your eyes from debris and fuel splashes. Gloves protect your hands from harmful chemicals. Wear appropriate clothing to prevent skin exposure.
Work In A Well-ventilated Area
Fuel fumes can be dangerous. Ensure good ventilation to avoid inhaling harmful vapors. Open windows or work outside for fresh air circulation.
Disconnect The Battery
Prevent accidental sparks by disconnecting the battery. This reduces the risk of electrical fires. Always ensure the engine is off before starting.
Have A Fire Extinguisher Nearby
Fuel can be flammable. Keep a fire extinguisher within reach for emergencies. This ensures quick action if a fire starts.
Use The Right Tools
Using proper tools prevents damage to the carburetor. Ensure tools are in good condition and fit for the task. This enhances safety and efficiency.
Follow Manufacturer Instructions
Read the Holley carburetor manual thoroughly. Follow instructions for safe and accurate float adjustment. This ensures the carburetor functions correctly.
Identifying Float Types
Adjusting the floats on a Holley carburetor might seem like a daunting task, but understanding the different types of floats can simplify the process. Carburetor floats play a crucial role in maintaining the fuel level, and different types require different handling. Knowing whether your carburetor uses brass or nitrophyl floats can save you time and effort, ensuring you make the right adjustments.
Brass Floats
Brass floats are durable and resistant to fuel additives, which makes them a popular choice among enthusiasts. They are hollow, allowing them to float on the fuel and manage the fuel level effectively. If your carburetor has brass floats, you might notice their shiny metallic appearance when you open the carburetor.
When adjusting brass floats, you need to be gentle as bending them can lead to incorrect fuel levels. They can be a bit tricky due to their rigidity, but with careful handling, you can achieve precision. Ensure there are no signs of corrosion or leaks, as these can affect performance.
Nitrophyl Floats
Nitrophyl floats are made from a synthetic material that is lightweight and buoyant. They are black and solid, which makes them easy to identify compared to brass floats. This type of float is less prone to bending, making it easier for beginners to adjust without damaging them.
However, they can absorb fuel over time, leading to incorrect readings. Regular checks are important to ensure they maintain their buoyancy. If you notice your nitrophyl floats are getting heavy or saturated, replacing them might be the best solution.
Have you ever adjusted a float only to find out it was the wrong type? Understanding these differences can prevent such mishaps. Whether you have brass or nitrophyl floats, ensuring they are in good condition is key to a smooth-running carburetor. Which type do you think would best suit your needs?
Preparing The Carburetor
Adjusting the floats on a Holley carburetor requires careful preparation. A well-prepared carburetor ensures smooth adjustment and optimal performance. Before starting, gather necessary tools and ensure a clean workspace.
Follow these steps to prepare your carburetor effectively. This will help avoid common pitfalls and ensure success.
Removing The Carburetor
First, disconnect the battery to prevent any electrical issues. Locate the carburetor on top of the engine. Carefully detach fuel lines using a wrench. Be gentle to avoid damaging the connections.
Next, loosen the bolts securing the carburetor to the engine manifold. Lift the carburetor off the engine with steady hands. Place it on a clean, flat surface. Ensure all bolts and parts are stored safely.
Cleaning The Carburetor
A clean carburetor is crucial for proper adjustment. Use a carburetor cleaner spray to remove dirt and debris. Pay attention to the jets and passages. These areas often collect grime.
Wipe the exterior with a clean cloth. Inspect for any signs of wear or damage. Replace any worn parts to maintain functionality. A thorough cleaning ensures accurate float adjustment.
Adjusting The Float Level
Adjusting the float level in a Holley carburetor can feel like a daunting task, but it’s essential for ensuring your engine runs smoothly. A correct float level ensures that the right amount of fuel is delivered to the engine, preventing issues like stalling or flooding. Let’s break down the process to make it manageable and get your vehicle purring like a kitten.
Locating The Float Bowl
The first step is identifying where the float bowl is situated. It’s typically found on the side of the carburetor, and it’s easy to spot once you know what you’re looking for. You might need to remove a few screws to access it, so have your tools ready.
Remember, when I first tackled this, I spent more time searching for tools than working on the carburetor. Organize your workspace before you start. The float bowl is your gateway to success in this adjustment process.
Setting The Correct Float Height
Once you have access to the float bowl, it’s time to adjust the float height. This is crucial because if the float is set too high or low, it can lead to engine troubles. Use a ruler or gauge to measure the distance from the float to the gasket surface.
Adjusting the float is not about guesswork. You’ll want to ensure the float is set according to the specifications provided in your Holley carburetor manual. This step can make or break your carburetor’s performance.
Did you know that a properly adjusted float can improve fuel efficiency? It’s amazing what a small tweak can do. Have you ever thought about how much fuel you might be wasting with a poorly adjusted carburetor? Take control and make those adjustments count.
Checking For Leaks
Checking for leaks in a Holley carburetor is crucial. Leaks can lead to engine inefficiency and potential damage. Addressing leaks ensures your vehicle runs smoothly. Detecting these leaks early can save time and money. Here’s how you can identify and fix them.
Visual Inspection
Start with a visual inspection. Look for any visible fuel stains. These stains often appear around the carburetor base. Pay close attention to the gasket areas. Fuel leaks can often occur here. Use a flashlight for better visibility.
Testing With A Pressure Gauge
A pressure gauge can help find leaks. Attach the gauge to the fuel line. Then, pressurize the system gently. Watch the gauge reading closely. A drop indicates a potential leak. Investigate further if the pressure decreases.
Soap And Water Test
Mix soap with water to create a solution. Apply this solution around the suspected areas. Bubbles will form where leaks exist. This test is simple yet effective. Ensure the engine is off during this test.
Inspecting Seals And Gaskets
Seals and gaskets wear out over time. Check them for any signs of damage. Cracks or breaks can lead to leaks. Replace any damaged seals immediately. This simple step can prevent future issues.
Final Checks
After addressing potential leaks, reassemble the carburetor. Start the engine to ensure everything is fixed. Listen for any unusual sounds. Keep an eye out for new leaks. Regular checks help maintain performance.
Testing The Adjustment
Adjusting the floats on a Holley carburetor ensures proper fuel levels for optimal engine performance. Carefully tweak the float settings for smooth operation and prevent flooding or fuel starvation. Regular checks and precise adjustments can enhance the carburetor’s efficiency.
Testing the adjustment of floats on a Holley carburetor is crucial. Proper adjustment ensures optimal engine performance. After adjusting the floats, it’s important to verify the changes. Testing helps identify any remaining issues. It confirms that the carburetor functions efficiently. The following steps guide you through testing the adjustment.Reinstalling The Carburetor
Begin by carefully reinstalling the carburetor. Ensure all components fit securely. Tighten all bolts and screws properly. Check for any leaks or loose fittings. A stable installation prevents future problems. Once secure, connect all necessary hoses and wires. Double-check that everything is in place.Performing A Test Run
Start the engine and let it idle. Listen for any unusual sounds. Observe the engine’s idle speed. It should be smooth and steady. Watch for smoke or strong fuel smells. These indicate possible issues. Rev the engine gently to check response. Ensure acceleration is smooth. Test drive the vehicle for further assessment. Pay attention to power delivery and response. Make note of any irregularities. Adjust as needed based on observations.Troubleshooting Common Issues
Adjusting the floats on a Holley carburetor can resolve several engine issues. Proper float adjustment ensures optimal engine performance. Discover common problems and solutions below.
Flooding Issues
Flooding occurs when excess fuel enters the engine. This can lead to hard starts and poor performance. Check the float level first. Ensure it’s not set too high. High levels cause fuel overflow. Inspect the needle and seat for debris. Clean them thoroughly to avoid blockage. Also, examine the float for any punctures or damage. Replace damaged floats promptly.
Fuel Starvation
Fuel starvation results from inadequate fuel reaching the engine. This can cause misfires and stalling. Ensure the float level is not too low. Low levels restrict fuel flow. Inspect the fuel lines for any kinks or obstructions. Clear any blockages to maintain smooth fuel delivery. Check the fuel pump pressure. It should meet the required specifications. Verify the fuel filter is clean. A clogged filter disrupts fuel flow.
Maintenance Tips
Maintaining your Holley carburetor ensures your engine runs smoothly. Regular care prevents costly repairs and keeps your vehicle in top shape. Proper float adjustment is key for efficient fuel delivery. Learn simple maintenance tips to keep your carburetor performing at its best.
Regular Inspection
Inspect the floats monthly for wear or damage. Check for fuel leaks or corrosion. Use a flashlight to see inside the carburetor. Ensure floats move freely without sticking. Adjust if needed to maintain correct fuel levels. Early detection prevents bigger problems.
Float Replacement
Replace floats every two years or if damaged. Old floats may cause engine performance issues. Purchase quality replacements from trusted brands. Follow the manual for installation steps. Ensure proper alignment and secure fitting. Regular replacement avoids engine trouble.
Frequently Asked Questions
How Do You Adjust The Float Level On A Holley Carburetor?
To adjust the float level on a Holley carburetor, first remove the sight plug. Adjust the float screw until fuel trickles out. Tighten the lock screw once the desired level is set. Ensure the engine is off during adjustment to avoid accidents.
How To Properly Adjust Carburetor Float?
To adjust the carburetor float, first remove the carburetor. Check the float level using a gauge. Bend the float tab gently to correct the level. Ensure it aligns with the manufacturer’s specifications. Reassemble the carburetor, then test the engine for proper performance.
Adjust again if necessary.
What Are The Symptoms Of Incorrect Carburetor Float Height?
Incorrect carburetor float height causes engine stalling, poor fuel efficiency, rough idling, and misfiring. It can lead to hard starting and flooding. Adjusting the float height can improve engine performance and prevent fuel leakage. Regular maintenance ensures optimal carburetor function, enhancing vehicle reliability and longevity.
What Direction Do You Turn The Nut On A Holley 750 To Adjust The Float?
Turn the nut on a Holley 750 counterclockwise to lower the float. Turn it clockwise to raise the float. Adjust gradually for precise tuning. Make sure the engine is off during adjustments for safety. Proper float adjustment ensures optimal carburetor performance.
Conclusion
Adjusting floats on a Holley carburetor can boost engine performance. Start by ensuring the carburetor is clean and free of debris. Use the right tools for accurate adjustments. Check your float levels regularly to maintain efficiency. Mistakes can lead to poor engine performance.
Follow these steps carefully to avoid issues. Practice makes perfect, so take your time. With patience, you’ll achieve optimal results. Your engine will run smoothly with proper float adjustments. Enjoy a better driving experience with these simple steps. Remember, well-maintained carburetors enhance vehicle performance and longevity.
Stay attentive to your engine’s needs.

Ethan Montgomery is the administrator of carweldhub.com and an expert in the automotive industry. With hands-on experience in welding and a deep understanding of automotive parts and accessories, Ethan brings a wealth of practical knowledge to his work. His passion for the automotive field extends to blog writing and editing, where he shares valuable insights and tips with enthusiasts and professionals alike. Whether you’re looking for detailed technical advice or the latest trends in automotive technology, Ethan’s expertise makes him a trusted resource in the automotive community.