How to Drill Carburetor Jets Walboro: Expert Tips
Are you struggling with getting the perfect performance out of your engine? You might be surprised to learn that the solution could be as simple as drilling carburetor jets.
When it comes to Walbro carburetors, precision is key, and understanding how to modify these jets can lead to significant improvements in your engine’s efficiency and power. Imagine having the ability to fine-tune your engine to its optimal performance, saving you time and money in the long run.
This article will guide you through the process of drilling carburetor jets for Walbro, giving you the skills to enhance your engine’s capabilities. Whether you’re a seasoned mechanic or a DIY enthusiast, mastering this technique will give you the confidence and expertise to tackle engine issues head-on. Stick around, and discover how a simple adjustment can make all the difference in your engine’s performance.
Tools And Materials
Drilling carburetor jets requires precision and the right tools. Without proper materials, the job becomes difficult. This guide will help you gather everything you need.
Drill Bits
Use small, precise drill bits. Carburetor jets need exact sizing. A set of micro drill bits works best. These bits usually range from 0.5mm to 2mm. They ensure the perfect fit. Choose high-speed steel for durability.
Drill
A small, handheld drill is ideal. It provides control and accuracy. Ensure the drill is lightweight. This helps in delicate operations. Cordless drills offer flexibility. They are also easy to handle in tight spaces.
Safety Gear
Always prioritize safety. Wear safety goggles to protect your eyes. Tiny metal shavings can cause injuries. Gloves are also essential. They protect your hands during the process. Ensure the gloves fit snugly.
Magnifying Glass
A magnifying glass helps in detailed work. It ensures precision when drilling. You can see tiny details better. This reduces mistakes. Opt for a glass with a built-in light for better visibility.
Marker
Use a fine-tip marker for marking. It helps in identifying the drill points. This ensures accuracy. Choose a marker that stands out on metal surfaces. It should be easily visible.
Cleaning Kit
After drilling, clean the jets thoroughly. Use a cleaning kit designed for carburetors. It removes metal shavings and debris. Ensure the jets are clear. This step is crucial for proper functioning.
Safety Precautions
Drilling carburetor jets demands caution. Wear safety glasses and gloves to protect against flying debris. Secure the jet firmly to prevent movement during drilling.
Drilling carburetor jets, particularly Walbro ones, can significantly improve your engine’s performance. However, it’s crucial to prioritize safety throughout the process. This isn’t just about protecting your equipment—it’s about ensuring your personal safety as well. Before you even think about picking up that drill, let’s dive into some essential safety precautions that will safeguard both you and your project.Wear Protective Gear
Safety goggles and gloves should be your first line of defense. Metal shavings can fly off at high speeds and cause injury. Without adequate eye protection, you risk serious harm. Gloves protect your hands from sharp edges and accidental slips.Ensure Proper Ventilation
Drilling can release fumes and fine particles into the air. Working in a well-ventilated area is crucial to avoid inhaling harmful substances. Consider setting up a fan or working outdoors to keep the air circulating. It’s a small step that can have a big impact on your health.Secure Your Workspace
A cluttered workspace can lead to accidents. Make sure your area is clean and organized before starting. Secure your jet in a vise to prevent it from moving. This stability not only ensures precise drilling but also minimizes the risk of injury.Use The Right Tools
Using the correct drill bit size is vital for precision. A mismatch can damage the jet or your drill. Double-check that you have the appropriate tools before beginning. This saves you from potential frustration and costly mistakes.Check For Flammable Materials
Carburetor jets and fuel residue can be flammable. Ensure there are no open flames nearby. It’s easy to overlook this, but a simple check can prevent a fire hazard. Always have a fire extinguisher within reach just in case.Maintain Focus And Patience
Rushing can lead to errors and accidents. Take your time to focus on each step carefully. If you find yourself getting frustrated, take a break. Your safety and the quality of your work both depend on a calm and steady approach.Regularly Inspect Tools
Before starting, inspect your tools for any signs of wear or damage. A faulty tool can lead to unexpected accidents. Regular maintenance ensures your tools are always in top condition. How do you ensure safety in your DIY projects? These precautions not only keep you safe but also enhance the quality of your work. Remember, a successful project is one that you complete safely.Identifying Jet Size
Identifying the right jet size is crucial for carburetor efficiency. Walboro carburetors depend on the correct jet size to deliver optimal engine performance. The process involves some basic steps and considerations.
Understanding Jet Size Importance
The jet size controls fuel flow to the engine. Too small, and the engine starves. Too large, and it floods. Precision matters.
Checking Existing Jet Size
Start by examining your current jet size. It’s usually marked on the side of the jet. Use a magnifying glass if needed for clarity.
Using A Jet Gauge
A jet gauge helps determine the exact size. Insert the gauge into the jet. Match the gauge number with the jet size.
Consulting The Manual
Your carburetor manual provides size specifications. Check the manual for recommended jet sizes for different conditions.
Considering Engine Needs
Evaluate your engine’s requirements. High-performance engines may need larger jets. Standard engines require smaller sizes.
Testing For Optimal Performance
Install the identified jet size. Test the engine’s performance. Listen for smooth operation. Adjust if necessary.
Correct jet sizing ensures your Walboro carburetor functions efficiently. Follow these steps for better engine performance.

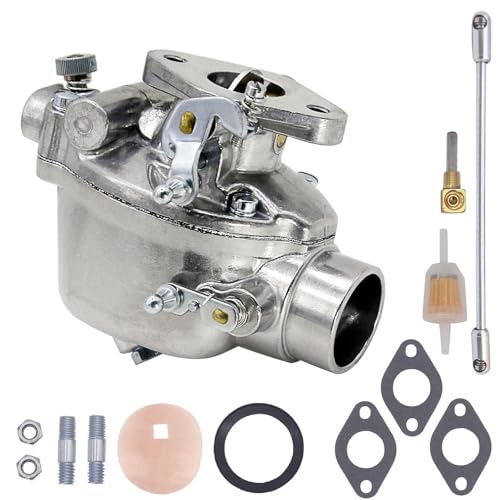
Credit: www.ebay.com
Preparing The Carburetor
Drilling Walboro carburetor jets demands precision and patience. First, gather necessary tools like drill bits and safety gear. Carefully adjust the drill to match the jet size, ensuring smooth airflow in your engine.
Preparing your carburetor is a crucial step before drilling Walbro jets. This ensures the process goes smoothly and minimizes the risk of damaging parts. Getting everything ready is half the battle when it comes to achieving optimal performance.Gather Your Tools
Start by gathering the necessary tools. You will need a set of drill bits, a drill, safety goggles, and a clean workspace. A small flashlight can also help you see inside the carburetor better. Having everything within reach keeps you focused and reduces the chance of errors.Clean The Carburetor
Before you begin drilling, clean the carburetor thoroughly. Use a carburetor cleaner to remove any grime or residue. This prevents debris from contaminating the jet during drilling. A clean carburetor enhances performance, making your drilling efforts worthwhile.Inspect The Carburetor
Carefully inspect the carburetor for any cracks or damage. Look closely at the jets and surrounding areas. If you find any issues, address them before proceeding. Ignoring these can lead to bigger problems down the road.Secure The Carburetor
Ensure the carburetor is securely positioned. Use clamps or a vise to hold it steady. This prevents movement and increases precision during drilling. A steady hand and a secure base are your best allies for a flawless job.Understand The Jet Size
Determine the correct jet size for your carburetor. Refer to your vehicle’s manual or consult a professional. Understanding the size is crucial for effective drilling. Choosing the wrong size can impact your engine’s performance. Prioritize safety throughout the preparation process. Wear safety goggles to protect your eyes from flying debris. Ensure your workspace is well-lit and ventilated. Safety should never be compromised, especially in DIY projects.Set Your Goals
Ask yourself why you’re drilling the jets. Is it for better fuel efficiency or enhanced power? Knowing your goals keeps you motivated and guides your approach. What do you hope to achieve with this modification? Preparing your carburetor is not just a step—it’s a foundation for success. With each careful preparation, you’re setting the stage for a smoother, more efficient drilling process. Now, are you ready to start drilling with confidence?Drilling Techniques
Drilling carburetor jets is a precise task. Proper techniques ensure accuracy and efficiency. This section explores essential drilling methods. These techniques help achieve optimal performance for Walbro carburetors.
Choosing The Right Drill Bit
Picking the correct drill bit is crucial. Carburetor jets require specific sizes for accuracy. Use high-speed steel bits. They are durable and effective for metal work. Select a bit matching the desired jet size. Double-check measurements before drilling.
Maintaining Precision
Precision is key in drilling carburetor jets. Secure the jet firmly before starting. Use a vise or clamp for stability. Keep the drill steady and aligned. Apply gentle pressure to avoid damage. Check progress regularly to ensure accuracy. Always prioritize safety during the process.

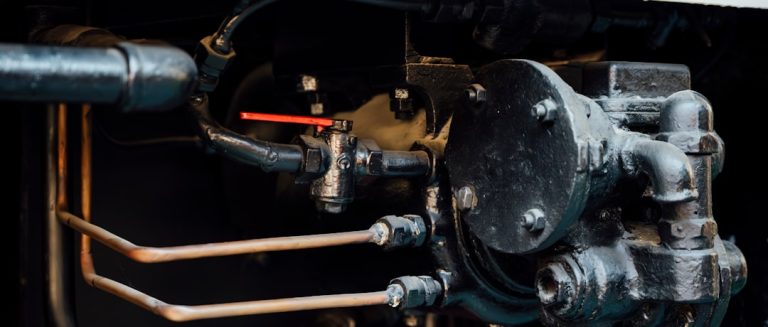
Credit: us.amazon.com
Testing And Adjustments
Testing and adjustments are crucial steps after drilling carburetor jets. These steps ensure optimal performance and safety. A carburetor must function well to maintain engine efficiency. Incorrect jet sizes can lead to engine problems. Testing helps identify any issues early. Adjustments fine-tune the carburetor for best results.
Inspecting The Drill Work
Begin by examining the drilled jets. Check for smooth and even openings. Use a magnifying glass for a closer inspection. Look for any metal shavings or rough edges. These can affect fuel flow. Clean the jets thoroughly if needed. Ensure no debris remains inside. Proper inspection prevents future problems.
Fine-tuning Performance
Install the jets back into the carburetor. Start the engine and let it idle. Listen for any irregular sounds. Watch for smoke or unusual behavior. Adjust the air-fuel mixture screw slowly. This helps achieve a balanced mixture. Test the engine at different speeds. Ensure smooth acceleration and deceleration. Make small adjustments as needed for performance.
Regular testing and adjustments extend engine life. They also improve fuel efficiency and reduce emissions. This process ensures your vehicle runs smoothly. Always prioritize safety and precision during these steps.
Common Mistakes
Drilling carburetor jets can lead to problems if done incorrectly. Using the wrong drill size damages the jet, affecting engine performance. Always ensure proper alignment to prevent uneven flow and engine issues.
Drilling carburetor jets for a Walboro can be a rewarding DIY task, enhancing your engine’s performance. However, it’s easy to stumble into common mistakes that can lead to inefficiencies or even damage. Understanding these pitfalls is crucial for achieving the best results. Let’s dive into some of the frequent errors and how you can avoid them.Improper Drill Bit Size
Using the wrong drill bit size is a frequent mistake. It’s essential to choose a bit that matches the desired jet size precisely. A bit too large can lead to excessive fuel flow, causing the engine to run rich. Conversely, a bit too small won’t improve performance. Always double-check the bit size against your specifications. A simple error here could mean starting over or, worse, needing a new jet.Ignoring Safety Precautions
Safety often takes a backseat in the excitement of modifying carburetor jets. Skipping goggles or gloves might seem harmless but can lead to injuries. Tiny metal shavings can easily get into your eyes. Gloves protect your hands from accidental slips. Prioritize safety gear to avoid regrettable accidents.Failing To Clean The Jets Thoroughly
Before drilling, jets should be spotless. Dirt or residue can affect the drilling process. It can also lead to uneven flow rates once reinstalled. Use a carburetor cleaner to remove any deposits. This ensures a smooth drilling process and optimal engine performance afterward.Overlooking The Importance Of Measurements
Precision is key in modifying carburetor jets. A small deviation can lead to significant performance changes. Measure twice, drill once. I once assumed a rough estimate was enough, only to find my engine sputtering. Accurate measurements save you time and frustration.Neglecting To Test After Drilling
After the hard work of drilling, it’s tempting to skip testing. This is a mistake. Testing helps ensure that the modification achieved the desired effect. It also identifies any issues before they become major problems. Take your engine for a test run, noting any changes in performance or sound. Are you making any of these mistakes? Correcting them can make your DIY project smoother and more successful. Each step you take with care brings you closer to optimal engine performance.Maintenance Tips
Drilling carburetor jets on a Walbro carburetor requires precision and care. Use a small drill bit to widen the jet opening. Clean the jets thoroughly to ensure smooth fuel flow.
Maintaining your Walbro carburetor jets is crucial for ensuring optimal engine performance. Regular maintenance can help prevent clogs and extend the lifespan of your carburetor. Let’s delve into some practical tips that will keep your carburetor jets in top shape.Inspect Regularly
Regular inspection can save you from unexpected breakdowns. Check your carburetor jets for any signs of wear or blockage. A quick look every few months can help you catch potential issues early.Clean Thoroughly
Cleaning is key to maintaining your carburetor jets. Use a carburetor cleaner spray to remove any dirt or residue. Make sure to follow up with compressed air to clear any remaining debris.Use The Right Tools
Using the correct tools is essential when working with carburetor jets. A set of precision screwdrivers and jet cleaning wires can make the job easier. Avoid using makeshift tools that could damage the jets.Check For Wear And Tear
Over time, jets can wear down. Look for signs of erosion or deformation. If you notice any damage, consider replacing the jets to maintain engine efficiency.Keep Spare Jets
Having spare jets on hand can be a lifesaver. You never know when you might need them. Keep a set of spare jets in your toolbox for quick replacements.Secure Connections
Ensure all connections are tight and secure. Loose fittings can lead to fuel leaks and inefficiencies. Double-check each connection after maintenance to prevent issues.Monitor Performance
Pay attention to how your engine runs after maintenance. Is the performance smoother? Are you noticing any unusual sounds? Monitoring these changes can provide insights into the effectiveness of your maintenance routine. Engaging with your carburetor jets’ maintenance doesn’t have to be daunting. Have you ever had a moment where regular maintenance saved you from a bigger problem? These tips can make all the difference in keeping your engine running smoothly.
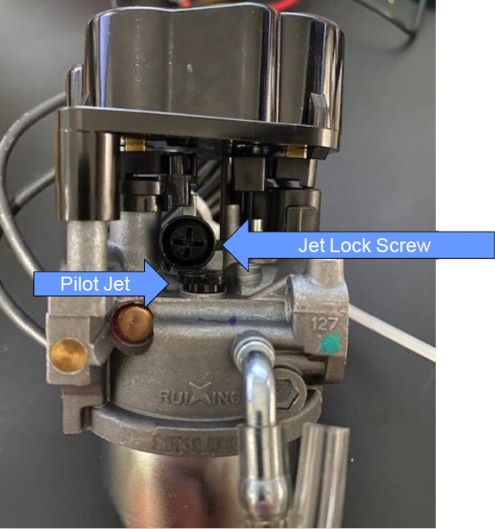
Credit: drillbitsunlimited.com
Frequently Asked Questions
Can You Drill Out Jets?
Yes, you can drill out jets to increase fuel flow. Use precision tools to avoid damage. Ensure proper sizing to maintain engine efficiency and performance. Consult the manufacturer’s guidelines or a professional mechanic for accurate adjustments. Improper drilling can lead to engine issues or reduced fuel efficiency.
How To Clear A Clogged Carburetor Jet?
To clear a clogged carburetor jet, remove it carefully. Use a carburetor cleaner spray to dissolve debris. Gently clear remaining blockages with a fine needle or compressed air. Reassemble the parts securely. Regular maintenance helps prevent future clogs.
How To Get A Stripped Carb Jet Out?
Use a rubber band for grip on the screwdriver. Apply gentle pressure while turning to remove the jet.
How To Figure Out Carb Jetting?
Begin by checking your engine’s manual for recommended jetting sizes. Test ride the bike, observing performance. Adjust jets based on symptoms like poor acceleration or backfiring. Opt for larger jets if lean and smaller if rich. Re-test and fine-tune until optimal performance is achieved.
Conclusion
Drilling carburetor jets can enhance your engine’s performance. Precision is key. Use the right tools and steady hands. Always measure carefully before drilling. Safety comes first; wear protective gear. Practice on spare jets if needed. Small adjustments can make a big difference.
Test your engine after modification. Ensure smooth performance and optimal fuel flow. Regular maintenance keeps your engine running efficiently. Stay patient and attentive throughout the process. With these steps, you can improve your carburetor jets successfully. Enjoy the improved ride and better engine efficiency.
Happy drilling!

Ethan Montgomery is the administrator of carweldhub.com and an expert in the automotive industry. With hands-on experience in welding and a deep understanding of automotive parts and accessories, Ethan brings a wealth of practical knowledge to his work. His passion for the automotive field extends to blog writing and editing, where he shares valuable insights and tips with enthusiasts and professionals alike. Whether you’re looking for detailed technical advice or the latest trends in automotive technology, Ethan’s expertise makes him a trusted resource in the automotive community.