How to Replace Lower Ball Joint Ford Ranger: Step-by-Step Guide
If you’ve noticed unusual noises or steering problems with your Ford Ranger, the lower ball joint might be the culprit. Replacing this part can seem tricky, but you don’t have to be a mechanic to do it yourself.
In this guide, you’ll learn simple, step-by-step instructions to replace your lower ball joint safely and effectively. By the end, you’ll save money and get your truck back on the road with confidence. Ready to take control of your Ford Ranger’s maintenance?
Let’s dive in.
Tools And Materials Needed
Replacing the lower ball joint on a Ford Ranger needs the right tools and materials. Having everything ready saves time and avoids frustration. The process requires specific tools to remove and install parts safely and correctly.
Knowing what parts to replace and having safety gear is just as important. Prepare your workspace and gather all items before starting. This list ensures the job goes smoothly and safely.
Essential Tools
- Socket set with ratchet and extensions
- Ball joint press or removal tool
- Breaker bar for stubborn bolts
- Torque wrench to tighten bolts correctly
- Pry bar to help separate components
- Hammer and punch for stubborn parts
- Jack and jack stands for vehicle support
- Needle-nose pliers for cotter pins
- Wire brush to clean rust and debris
- Grease gun for lubrication
Replacement Parts
- New lower ball joint specific to Ford Ranger
- New cotter pins
- Replacement bolts and nuts if needed
- Grease pack included with ball joint
Safety Gear
- Safety glasses to protect eyes
- Mechanic gloves for hand protection
- Closed-toe shoes or boots
- Protective clothing to avoid dirt and cuts
- Wheel chocks to prevent vehicle movement
Preparing The Vehicle
Park the Ford Ranger on a flat surface and engage the parking brake. Loosen the lug nuts before lifting the vehicle with a jack and secure it with jack stands. Remove the wheel to access the lower ball joint safely.
Preparing the Vehicle Replacing the lower ball joint on a Ford Ranger begins with careful preparation. Ensuring the vehicle is secure and stable is crucial. This helps prevent any accidents and makes the job easier.Parking And Securing
Park the Ranger on a flat, solid surface. Engage the parking brake fully. Place wheel chocks behind the rear tires. This prevents any unwanted movement. Ensure the vehicle is in park or gear.Loosening Lug Nuts
Use a lug wrench to slightly loosen the lug nuts. Do this while the tire is still on the ground. This prevents the wheel from spinning. Don’t remove them completely yet.Raising The Truck
Position a floor jack under the jacking point. Lift the truck until the tire is off the ground. Place jack stands under the frame for safety. Lower the truck onto the stands gently. Double-check the stability before proceeding.Removing The Wheel
Removing the wheel is a crucial step before you can access the lower ball joint on your Ford Ranger. It might seem simple, but doing it right ensures your safety and makes the rest of the job smoother. Skipping or rushing this part often leads to stripped lug nuts or difficulty lifting the tire off, so take your time and use the right tools.
Taking Off Lug Nuts
Start by loosening the lug nuts while the truck is still on the ground. This prevents the wheel from spinning and gives you better leverage. Use a breaker bar or a lug wrench to turn each nut counterclockwise.
Remember, lug nuts can be tight. If they don’t budge easily, try pressing your body weight down on the wrench for extra force. Avoid using an impact wrench at this stage unless you’re confident it won’t damage the nuts.
Once the nuts are loose, don’t remove them completely yet. This keeps the wheel stable when you lift the vehicle.
Removing The Tire
Next, use a jack to lift your Ford Ranger until the tire is clear off the ground. Make sure you place the jack under the recommended lifting point to avoid damage or slipping.
After the truck is securely lifted, remove the lug nuts completely and set them aside in a safe spot. Pull the tire straight off the hub; if it’s stuck, gently tap the back of the tire with a rubber mallet to loosen it.
Have you ever struggled with a wheel that just won’t come off? Taking a moment to spray some penetrating oil around the hub can save you time and frustration. Now your wheel is off and you have full access to the suspension components, ready to tackle the lower ball joint replacement.

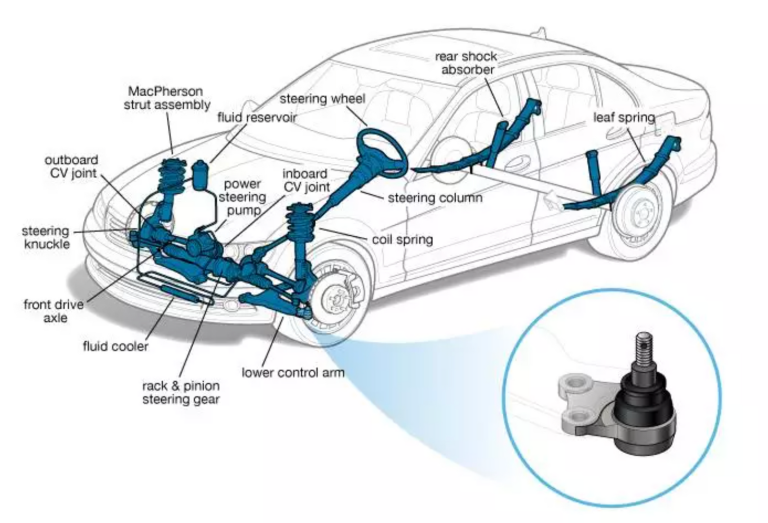
Credit: www.import-car.com
Accessing The Lower Ball Joint
Accessing the lower ball joint on your Ford Ranger is a crucial part of the replacement process. It requires careful preparation and a clear understanding of the components surrounding the joint. Taking the time to properly access the ball joint can save you frustration and prevent damage to other parts of your vehicle.
Locating The Ball Joint
The lower ball joint sits at the connection point between the control arm and the steering knuckle. You’ll find it near the bottom of the front suspension assembly. Sometimes dirt and rust can hide it, so give the area a quick clean to spot the ball joint clearly.
Have you checked your owner’s manual or a repair guide? These resources usually include diagrams that make identifying the exact location easier. Knowing exactly where it is helps you avoid unnecessary removal of parts.
Removing Brake Components
Before you can reach the ball joint, the brake components need to come off. This usually means removing the brake caliper and rotor. Use a suitable wrench or socket to take off the caliper bolts, then carefully hang the caliper with a hook or wire—don’t let it dangle by the brake hose.
Removing the rotor might require a few taps with a rubber mallet if it’s stuck. This step is often overlooked, but skipping it can damage the brake system or make the job much harder. Have you prepared a clean, safe spot to place these parts? Keeping them organized speeds up reassembly.
Disconnecting The Steering Knuckle
The steering knuckle connects to the lower ball joint via a stud and nut. You’ll need to remove the nut securing the ball joint to the knuckle. Applying some penetrating oil here can make loosening the nut easier, especially if it’s rusty.
Once the nut is off, use a ball joint separator tool or a hammer carefully to release the knuckle from the joint. This part can be tricky; forcing it too hard risks bending or damaging the knuckle. Have you tried gentle taps around the joint to loosen it first? Patience here pays off.
Removing The Old Ball Joint
Removing the old ball joint from your Ford Ranger is a key step in replacing it safely. This process requires careful handling to avoid damage to surrounding parts. Use the right tools and follow each step closely to ensure the job is done correctly.
Unfastening Ball Joint Bolts
Start by loosening the bolts that hold the ball joint in place. Use a wrench or socket set to turn the bolts counterclockwise. Sometimes, these bolts can be tight or rusted. Apply penetrating oil and wait a few minutes to help loosen them. Keep the vehicle stable and supported before working underneath.
Separating Ball Joint From Control Arm
After unfastening, the ball joint stays connected to the control arm. Use a ball joint separator tool or a pickle fork to pry them apart. Place the tool between the ball joint and control arm, then tap it gently with a hammer. This action breaks the joint free without harming the control arm. Take care not to bend or damage other suspension parts.
Extracting The Ball Joint
With the ball joint loose, pull it out from its mounting hole. Some models may require pressing the ball joint out using a press tool. Check for any clips or retaining rings and remove them first. Clean the area to prepare for the new ball joint installation. Handle the old ball joint carefully to avoid injury from sharp edges.

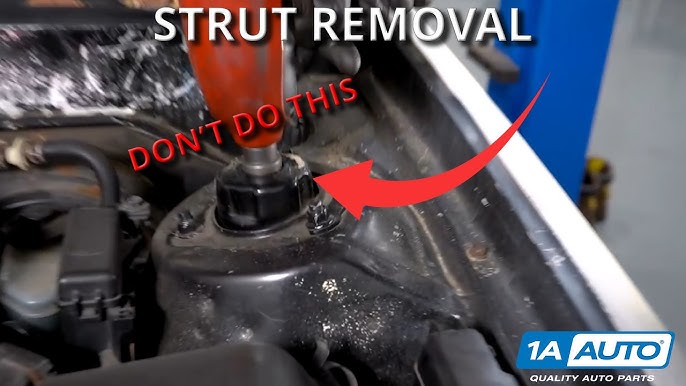
Credit: www.youtube.com
Installing The New Ball Joint
Installing the new ball joint is a key part of fixing your Ford Ranger’s suspension. This process needs care and accuracy. Proper installation ensures safety and smooth driving. Follow the steps closely for the best results.
Positioning The New Joint
Place the new ball joint carefully into the control arm. Align it with the mounting holes. Make sure the joint sits flush and fits snugly. Avoid forcing it to prevent damage. Check the orientation matches the old joint.
Securing Bolts And Nuts
Insert the bolts through the ball joint and control arm. Hand-tighten the nuts to hold the joint in place. Use a wrench to snug them up, but do not fully tighten yet. Confirm all bolts and nuts fit correctly and are not cross-threaded.
Applying Torque Specifications
Use a torque wrench to tighten bolts to the Ford Ranger’s specs. Tightening to the right torque ensures strength and safety. Refer to the vehicle manual for exact numbers. Tighten bolts evenly in a crisscross pattern if possible. Double-check all fasteners after torque application.
Reassembling Components
Reassembling the components after replacing the lower ball joint on your Ford Ranger demands attention to detail and patience. Each part must fit perfectly to ensure your vehicle drives safely and smoothly. Skipping or rushing through this stage can lead to costly issues down the road.
Reattaching Steering Knuckle
Start by aligning the steering knuckle with the new lower ball joint. Make sure the knuckle sits flush without forcing it into place. Tighten the ball joint nut securely, using a torque wrench to meet the manufacturer’s specifications.
Double-check the cotter pin slot. If the original cotter pin is damaged or bent, replace it with a new one to lock the nut in place. This small part plays a big role in preventing the nut from loosening while driving.
Installing Brake Parts
Next, carefully reinstall the brake components. Position the brake rotor and caliper exactly where they were before removal. Avoid touching the brake pads or rotor surfaces with greasy hands to maintain optimal braking performance.
Reconnect any brake lines or sensors you disconnected earlier. This is crucial for your ABS system and brake fluid flow. Have you inspected your brake hoses for cracks or leaks during this step? It’s a good opportunity to catch potential issues early.
Mounting The Wheel
Place the wheel back onto the hub, aligning the lug holes with the studs. Hand-tighten the lug nuts first to ensure the wheel sits properly. Then, lower the vehicle slightly so the tire touches the ground, preventing it from spinning.
Tighten the lug nuts in a crisscross pattern to evenly distribute pressure. Using a torque wrench, set the lug nuts to the recommended torque spec for your Ford Ranger. This prevents over-tightening or uneven pressure that could warp the rotor or damage the wheel.
Final Checks And Testing
After replacing the lower ball joint on your Ford Ranger, final checks and testing are crucial. This ensures safety and proper function. Skipping these steps could lead to steering problems or uneven tire wear. Take your time to perform each check carefully.
Lowering The Vehicle
Slowly lower the vehicle using the jack. Make sure the truck is stable on the ground. Remove the jack stands carefully. Keep the wheels off the ground only as long as needed. Check the suspension to see if it looks aligned and stable.
Tightening Lug Nuts
Use a torque wrench to tighten lug nuts. Follow the manufacturer’s torque specifications. Tighten nuts in a star pattern to ensure even pressure. Avoid over-tightening, which can damage the wheel or studs. Double-check each lug nut after the first round.
Test Driving Tips
Start with a slow, careful drive in a safe area. Listen for unusual noises or vibrations. Pay attention to steering response and vehicle stability. Test braking to ensure everything feels normal. After a short drive, recheck lug nuts and suspension parts for tightness.
Common Issues And Tips
Replacing the lower ball joint on your Ford Ranger can be straightforward if you understand the common issues and know how to avoid mistakes. Recognizing the signs of wear early helps prevent costly repairs down the road. Plus, adopting good maintenance habits can extend the life of your suspension parts and keep your truck running smoothly.
Signs Of Ball Joint Wear
Listen for clunking noises coming from the front suspension when you drive over bumps or make sharp turns. These sounds often signal a loose or worn ball joint. You might also notice uneven tire wear or your steering feeling loose and less responsive.
Check for visible damage like torn dust boots or excessive rust around the ball joint. If you can easily move the ball joint by hand when the wheel is off, it’s time to replace it. Don’t wait until the joint fails completely—early detection can save you from a dangerous situation on the road.
Avoiding Installation Mistakes
Make sure to use the correct tools, like a ball joint press, to avoid damaging surrounding components. Skipping the proper torque specs can cause the new joint to loosen or wear out prematurely. Always tighten nuts and bolts to the manufacturer’s recommended settings.
Pay attention to alignment after replacing the ball joint. Misalignment can lead to uneven tire wear and poor handling. If you’re unsure, have a professional check the alignment before driving extensively.
Maintenance Advice
Regularly inspect your ball joints for signs of wear or damage during routine oil changes or tire rotations. Keeping the joints clean and lubricated, if they are greaseable, helps prevent premature wear. Avoid driving through deep water or rough terrain unnecessarily, as this can accelerate ball joint deterioration.
Ask yourself: Are you giving your Ford Ranger the care it needs to avoid unexpected suspension issues? Simple checks every few months can save you time and money, and keep your ride safe and comfortable.

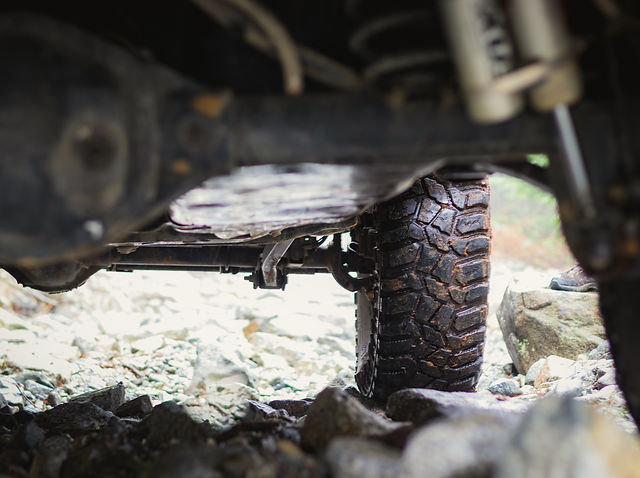
Credit: www.reddit.com
Frequently Asked Questions
How Do I Know When To Replace Lower Ball Joints?
Signs include uneven tire wear, clunking noises, and steering issues. Inspect regularly for looseness or damage to ensure safety.
What Tools Are Needed To Replace Ford Ranger Ball Joints?
You need a ball joint press, wrenches, sockets, a hammer, and jack stands. Proper tools ensure a smooth, safe replacement process.
Can I Replace Lower Ball Joints Myself Safely?
Yes, with mechanical knowledge and correct tools, you can. Follow safety protocols and the step-by-step guide carefully to avoid injury.
How Long Does It Take To Replace Lower Ball Joints?
Typically, it takes about 1 to 2 hours depending on experience and tools. Preparation and patience speed up the process.
Conclusion
Replacing the lower ball joint on your Ford Ranger can save money and improve safety. Follow each step carefully to avoid mistakes. Take your time and use the right tools for best results. Check your work before driving to ensure everything fits well.
Regular maintenance helps your truck run smoothly and last longer. Now you know how to do this repair yourself. Keep learning and caring for your vehicle. Safe driving!

Automotive Specialist & Expert Writer
Tyler Kingston is a passionate automotive writer with a wealth of knowledge in all things cars. With years of experience in the automotive industry, Tyler specializes in everything from vehicle maintenance to the latest car technologies and innovations. He is known for his ability to break down complex automotive concepts into easily digestible, engaging content for both novice and experienced car enthusiasts. Whether it’s detailing car repair techniques, reviewing new car models, or diving into the world of auto accessories, Tyler’s articles provide valuable insights to readers. His hands-on experience, combined with a genuine love for cars, allows him to deliver expert advice, tips, and news that keeps readers coming back for more.