How to Clean a Generator Carburetor Without Removing It: Easy Steps
Have you noticed your generator coughing and sputtering lately? When your generator isn’t running smoothly, it’s often the carburetor that needs some attention.
The good news is, you don’t have to be a mechanic or take everything apart to get it working like new. Cleaning the carburetor without removing it is easier than you might think, and you can do it with simple tools and techniques right in your own garage.
Imagine saving both time and money while boosting the performance of your trusty generator. Intrigued? Keep reading to discover the straightforward steps that will have your generator purring with power once again.
Essential Tools And Materials
Cleaning a generator carburetor without removal requires specific tools and materials. Essential items include a carburetor cleaner spray, a screwdriver, and a clean cloth. These tools help clear blockages and maintain the carburetor’s efficiency.
Cleaning a generator carburetor without removing it can seem like a daunting task. However, with the right tools and materials, you can make the job straightforward and efficient. Equipping yourself with the essentials will not only save you time but also ensure you do the job safely and effectively. Let’s explore what you’ll need to get started on this maintenance task.
Essential Tools
Before diving into the cleaning process, gather the necessary tools. A screwdriver set is crucial, as you’ll need it to access and adjust various parts of the carburetor. Make sure to have both flathead and Phillips screwdrivers handy. A small brush or toothbrush is excellent for scrubbing away grime and debris. Opt for one with firm bristles to reach tight spots effectively. Additionally, a can of compressed air will help blast away any stubborn dirt lodged in those hard-to-reach areas.
Necessary Materials
You’ll need a few materials to make the cleaning process smooth and hassle-free. A carburetor cleaner spray is indispensable. This powerful solvent dissolves deposits and varnish that accumulate in the carburetor. Make sure it’s compatible with your generator model for optimal results. Have a clean cloth or shop towels ready. These will be used to wipe down components after spraying, ensuring no residue is left behind. It’s also wise to keep a container or tray nearby to catch any drips or spills during the cleaning process.
Safety Gear
Don’t overlook the importance of safety gear. Wearing protective gloves will keep your hands safe from chemicals and sharp edges. Choose gloves that offer both protection and dexterity for better handling of tools and parts. Safety goggles are a must to protect your eyes from any splashes of the cleaning spray. Even a tiny droplet can cause irritation, so keep your eyes safe at all times.
Personal Experience Insight
In my own experience, having everything laid out before starting the task makes the process much smoother. I once realized mid-cleaning that I was missing a crucial tool, which led to unnecessary delays. This taught me the value of preparation, and I’ve since made it a rule to double-check my toolkit before any maintenance task. Are you ready to tackle your generator carburetor with ease? With the right tools and materials, you’re well-equipped to keep your generator running smoothly without the hassle of disassembly. What other maintenance tasks have you been putting off that could benefit from a little preparation and the right equipment?

Credit: www.bisongenerator.com
Safety Precautions
Ensure safety by disconnecting the generator’s spark plug before cleaning the carburetor. Use protective gloves and goggles. Work in a well-ventilated area to avoid inhaling harmful fumes.
Cleaning a generator carburetor without removing it can be a daunting task, but it’s entirely achievable with the right precautions. Ensuring your safety should always be your top priority before diving into this kind of maintenance work. Taking the time to understand and implement essential safety measures can prevent accidents and ensure a smooth cleaning process.
Wear Appropriate Protective Gear
Always start by wearing the right protective gear. Put on safety goggles to protect your eyes from potential splashes of fuel or cleaning solutions. Gloves are equally important to shield your hands from chemical exposure and sharp components. Wearing a long-sleeve shirt can also protect your skin from unexpected spills.
Ensure Proper Ventilation
Conduct your cleaning in a well-ventilated area. This reduces your exposure to harmful fumes and decreases the risk of inhaling toxic substances. If you’re working indoors, open windows and doors to ensure a steady flow of fresh air. Consider using a fan to help disperse any lingering fumes.
Disconnect The Power Source
Before you start, make sure the generator is completely turned off. Disconnect any power sources to prevent accidental startups while cleaning. This simple step can save you from potential electrical shocks and other hazards.
Handle Fuel With Care
Fuel is flammable and must be handled with caution. If you need to deal with the fuel system, ensure there are no open flames or sparks nearby. Use a fuel-safe container to catch any spills and avoid overfilling, which can lead to dangerous leaks.
Have A Fire Extinguisher Nearby
It’s always wise to have a fire extinguisher within reach. Even with all precautions taken, accidents can happen. Knowing you have a fire extinguisher ready can provide peace of mind and a quick response in case of a fire.
Be Mindful Of Surroundings
Take a moment to assess your work area. Keep your workspace organized and free of clutter to avoid tripping hazards. Store cleaning supplies and tools within easy reach but out of the way of your immediate work area. This helps maintain focus and prevents mishaps. Have you ever skipped a safety step, only to realize its importance later? Reflecting on past experiences can be a powerful reminder to prioritize safety first. While cleaning a generator carburetor without removing it is possible, ensuring your safety is non-negotiable. By following these precautions, you can tackle the task with confidence and peace of mind.
Identifying The Carburetor
Understanding the carburetor’s location is the first step in cleaning it. This component plays a crucial role in mixing air and fuel for your generator. Proper identification helps maintain your generator’s efficiency. Many people struggle to find the carburetor. Let’s simplify this process.
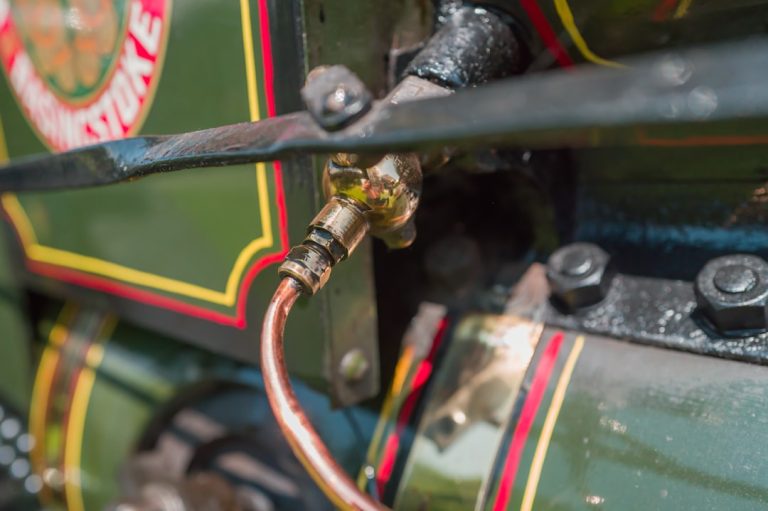
What Does A Carburetor Look Like?
The carburetor is a small metal part. It has tubes and screws. Often, it sits near the fuel tank. Its shape is often boxy or cylindrical. Look for a part with a fuel line attached.
Locating The Carburetor
Open the generator’s casing. This exposes the internal parts. Find the engine block. The carburetor is usually nearby. It’s often positioned between the air filter and the engine.
Signs You’ve Found The Carburetor
Check for fuel lines connected to it. These lines supply fuel to the carburetor. It may also have a throttle or choke lever attached. These are key indicators of its presence.

Credit: www.youtube.com
Preparing The Generator
Cleaning a generator carburetor without removing it requires careful preparation. The generator must be handled safely to prevent accidents. Proper preparation ensures a smooth cleaning process. Follow these steps to prepare your generator effectively.
Switch Off And Unplug
Begin by switching off your generator. Make sure it is completely turned off. Unplug any connected devices. This prevents electrical hazards. Check the power switch to ensure it is in the ‘off’ position. Safety comes first.
Allow Cooling Period
After switching off, allow your generator to cool down. This prevents burns or injuries. Generators can get very hot during use. Waiting for a cooling period is crucial. It also helps avoid damaging components. A cool generator is easier to work with.
Accessing The Carburetor
Cleaning a generator carburetor without removing it requires careful access. Proper access ensures efficient cleaning and keeps the generator running smoothly. Follow these steps to reach the carburetor easily.
Locate The Air Filter
The air filter is the gateway to the carburetor. Find it near the engine casing. It usually sits in a black plastic or metal housing. Identifying the air filter is crucial for cleaning the carburetor.
Remove The Air Filter Cover
Removing the air filter cover is the next step. Unscrew or unclip it gently. This reveals the air filter beneath. Handle with care to avoid damaging nearby parts.
Once the cover is off, you can see the air filter. Remove the filter with caution. This provides direct access to the carburetor for cleaning. Ensure no debris falls into the carburetor.
Cleaning The Carburetor
Easily clean a generator carburetor without taking it apart. Use carburetor cleaner spray to remove dirt and deposits. Ensure efficient generator performance by maintaining a clear and clean carburetor.
Cleaning the carburetor of your generator without removing it might seem like a daunting task, but it’s not as complex as it sounds. Understanding the essential steps can save you time and hassle. Plus, maintaining a clean carburetor ensures your generator runs smoothly when you need it most.
Spray Carburetor Cleaner
Start by acquiring a high-quality carburetor cleaner spray. It’s your best friend for this task. Make sure your generator is turned off and completely cooled down for safety. Locate the air intake of your generator. This is where you’ll direct the spray. Spray the cleaner directly into the air intake while gently pulling the starter cord. This action helps distribute the cleaner throughout the carburetor. Be generous with the spray, but don’t overdo it. Excessive cleaner can cause build-up elsewhere. If you notice grime or dirt loosening, that’s a good sign you’re on the right track.
Clear Blockages
While spraying, keep an eye out for any visible blockages. These can restrict fuel flow and affect performance. If you spot debris or dirt, use a soft brush or a piece of wire to gently clear it. Be careful not to damage any components. Consider using compressed air to blow away stubborn particles. Just make sure the air pressure isn’t too high, as it can dislodge small parts. Have you ever faced a situation where your generator wouldn’t start? It could have been a blocked carburetor. Regular checks and cleaning can prevent this scenario. Remember, a clear carburetor ensures efficient fuel consumption. This not only saves you money but also prolongs the life of your generator. Taking these simple steps can make a significant difference. Your generator will thank you with reliable performance every time you need it.
Reassembling Components
Cleaning a generator carburetor without removing it involves careful disassembly of components. First, ensure the generator is off and cooled down. Carefully detach and clean visible parts, using carburetor cleaner to remove debris and residue.
Once you’ve successfully cleaned your generator carburetor without removing it, the next critical step is to reassemble the components. This step ensures that everything is put back in its rightful place, allowing your generator to function smoothly. Proper reassembly is crucial, as even a minor oversight can lead to operational issues.
Replace Air Filter Cover
Begin by replacing the air filter cover. Ensure that the air filter is correctly positioned before sealing the cover. It’s tempting to rush through this step, but a secure air filter is vital for optimal engine performance. If you’ve ever overlooked this step, you might recall the frustration of a generator that just won’t start. Take a moment to double-check everything. A little patience now can save you a lot of headaches later.
Secure All Parts
Next, secure all parts that you’ve handled during the cleaning process. This includes any screws, nuts, and bolts that were loosened. Use the appropriate tools to ensure everything is tightly fastened. Consider the last time you assembled something and had a leftover screw. That nagging feeling of something being amiss is what you want to avoid. Each component has a purpose, and securing them properly is key to a well-functioning generator. Have you ever had a loose part create noise or even damage? Ensuring all components are securely fastened will help prevent such issues. A secure assembly contributes to the longevity of your generator, ensuring it’s ready when you need it most. By focusing on these reassembly steps, you ensure a seamless transition back to normal operations for your generator. Remember, attention to detail in reassembly can make all the difference.
Testing The Generator
After cleaning your generator carburetor, ensure it functions well. Testing the generator is crucial. It helps confirm the effectiveness of your cleaning. You’ll know if the carburetor is in good shape. Follow these simple steps for effective testing.
Start The Engine
Begin by starting the engine. Make sure there’s enough fuel in the tank. Switch on the generator and listen carefully. The engine should start without much effort. A quick start indicates a clean carburetor. If it struggles, there might still be an issue.
Check For Smooth Operation
Observe the engine’s performance once it’s running. Listen for any unusual noises. The engine should run smoothly without sputtering. Consistent speed shows a properly cleaned carburetor. Check if the generator produces steady power. It should not fluctuate or show signs of weakness.
Maintenance Tips
Cleaning a generator carburetor without removing it involves using a carburetor cleaner spray. Carefully spray into the air intake while the generator runs. This method dissolves buildup and helps maintain engine efficiency. Regular cleaning prevents clogs and ensures smooth operation.
Maintaining your generator’s carburetor is crucial for ensuring smooth operation and extending its lifespan. It’s not just about keeping your generator running; it’s about optimizing performance and preventing costly repairs. You might wonder how often should you clean it or what signs indicate trouble? Let’s dive into some practical maintenance tips that will help you keep your generator in top shape without the hassle of removing the carburetor.
Regular Cleaning Schedule
Create a cleaning routine that suits your generator’s usage frequency. If you rely on your generator during power outages or for outdoor activities, consider a monthly cleaning. Set reminders or add it to your calendar. A few minutes of cleaning can save hours of frustration later. Think of it as a quick check-up to catch potential issues early. Wouldn’t it be easier to clean a little often than wait for a big problem?
Signs Of Carburetor Issues
Notice any unusual sounds? A sputtering or hesitating engine can be a sign of carburetor problems. If you experience difficulty starting your generator, it might be time to inspect the carburetor. Check for black smoke. This indicates your carburetor might be running rich, meaning too much fuel and not enough air. Have you ever wondered why your generator’s performance drops unexpectedly? Observing these signs can help you act before it’s too late. Maintaining your generator carburetor isn’t just about cleaning; it’s about being proactive. So, are you ready to give your generator the care it deserves?

Credit: in.pinterest.com
Frequently Asked Questions
Can You Clean A Generator Carburetor Without Taking It Apart?
Cleaning a generator carburetor without disassembly is possible using carburetor cleaner spray. Directly spray into the air intake while the generator runs. This helps remove minor clogs but may not address severe blockages. Regular maintenance improves efficiency. Always follow safety precautions and consult the manual for specific cleaning instructions.
How Do You Unclog A Carburetor Without Removing It?
Use a carburetor cleaner spray. Access the carburetor through the air intake. Spray cleaner directly into the carburetor throat. Let it sit briefly to dissolve deposits. Start the engine to help flush out loosened debris. Repeat if needed for persistent clogs.
Can I Use Wd-40 To Clean A Carburetor?
WD-40 is not recommended for cleaning carburetors. It may not effectively remove built-up residue. Use carburetor cleaner for best results.
What To Use To Clean A Generator Carburetor?
Use carburetor cleaner spray for cleaning generator carburetors. It dissolves dirt, varnish, and gum. Ensure the generator is off before cleaning. Follow instructions on the cleaner for best results. Regular maintenance keeps the carburetor functioning effectively.
Conclusion
Cleaning a generator carburetor without removing it is simple. Follow these steps for effective results. Start by gathering necessary tools and materials. Use a suitable carburetor cleaner spray. Aim it directly into the carburetor throat. Focus on visible debris and dirt.
Use a brush for stubborn grime. Repeat the process if needed. Regular maintenance prevents future issues. This method saves time and effort. Keeps your generator running smoothly. Always ensure safety while cleaning. A clean carburetor means better performance. Your generator lasts longer with proper care.
Enjoy uninterrupted power whenever needed.

Ethan Montgomery is the administrator of carweldhub.com and an expert in the automotive industry. With hands-on experience in welding and a deep understanding of automotive parts and accessories, Ethan brings a wealth of practical knowledge to his work. His passion for the automotive field extends to blog writing and editing, where he shares valuable insights and tips with enthusiasts and professionals alike. Whether you’re looking for detailed technical advice or the latest trends in automotive technology, Ethan’s expertise makes him a trusted resource in the automotive community.