How to Install Cabin Air Filter Honda Civic: Step-by-Step Guide
Imagine driving your Honda Civic with the windows down, enjoying the fresh air. But what if that fresh air isn’t as clean as it should be?
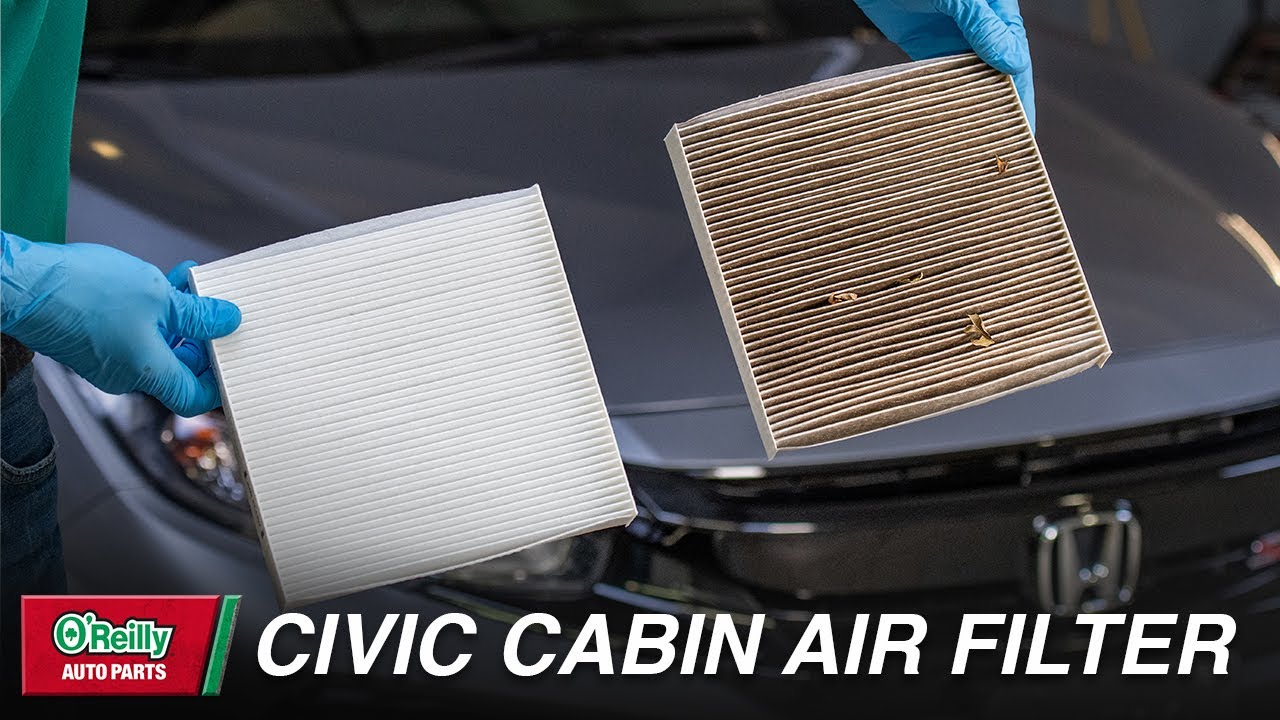
The cabin air filter plays a crucial role in ensuring that the air inside your car is free from dust, pollen, and other pollutants. If you’ve noticed a musty smell or reduced airflow from your vents, it might be time to change your cabin air filter.
Don’t worry; this task is easier than you think and can save you money compared to a dealership service. By learning how to install a cabin air filter in your Honda Civic, you ensure a healthier environment in your car and enhance your driving experience. Keep reading to find out how you can do this simple yet impactful maintenance task yourself.

Credit: www.ifixit.com
Tools And Materials Needed
Gather a new cabin air filter, a screwdriver, and a clean cloth. The screwdriver helps remove the glove box. A clean cloth ensures dust-free installation.
Changing the cabin air filter in your Honda Civic is a straightforward task that can make a significant difference in the air quality inside your car. Before you dive into the process, it’s crucial to gather all the necessary tools and materials. Having the right items on hand will not only make the job easier but also ensure that you do it correctly without damaging any components. Let’s explore what you need to have ready before you start.Tools Required
First and foremost, you’ll need a screwdriver. Most Honda Civics require a Phillips head screwdriver to remove the screws holding the glove compartment in place. A flashlight might be useful, especially if you’re working in a dimly lit garage or parking space. Consider using a pair of gloves to keep your hands clean and protected. This is especially helpful if you’re sensitive to dust or allergens.Materials Needed
You’ll need a new cabin air filter specifically designed for your Honda Civic model. Be sure to check your car’s manual or consult with your local auto parts store to get the correct size and type. It’s always wise to have a small towel or cloth nearby. This can be handy for cleaning any dust or debris that may have accumulated around the filter housing. Don’t forget a trash bag. You’ll need it to dispose of the old filter without spreading dust or dirt around your car.Preparation Tips
Before you begin, make sure your car is turned off and parked in a safe location. Are you comfortable with where everything in your car is located? Familiarize yourself with the glove compartment area to reduce any stress while working. Is your workspace tidy? A clean area will help you focus on the task and prevent losing small screws or other components. Preparing the right tools and materials can save you from frustration and make the installation process smoother. Do you have everything you need to start? Embrace the satisfaction of breathing cleaner air in your car by ensuring you’re fully equipped for this simple maintenance task.
Credit: www.youtube.com
Locating The Cabin Air Filter
Locating the cabin air filter in your Honda Civic is essential. A clean filter ensures fresh air in the cabin. It also helps maintain the efficiency of your car’s HVAC system. Follow these steps to find and access the cabin air filter easily.
Identifying The Filter Compartment
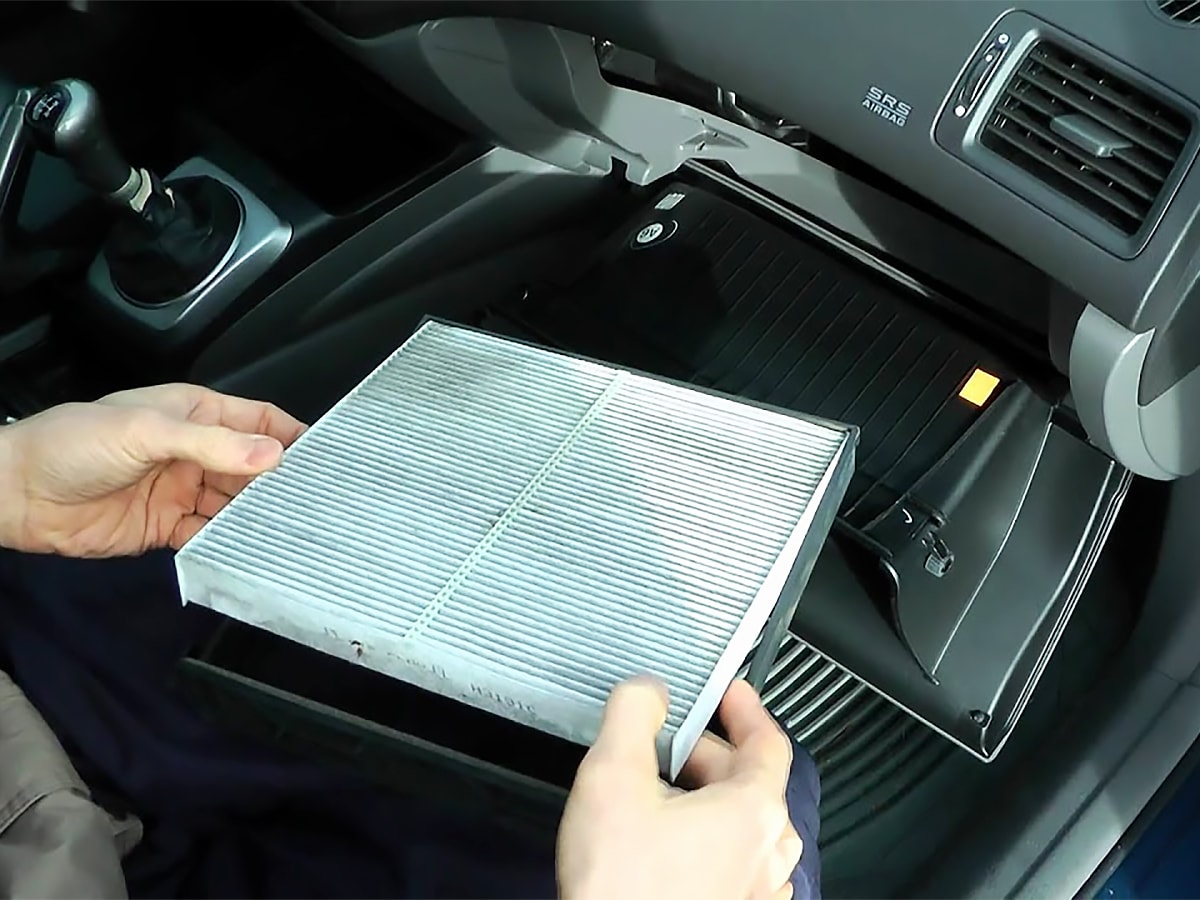
The cabin air filter is usually behind the glove box. First, sit in the passenger seat. Look for the glove box directly in front of you. The filter compartment is often behind or beneath it. Check your Honda Civic’s manual for specific details.
Accessing The Glove Box
To reach the cabin air filter, open the glove box. Remove any items inside. Find the stoppers on the sides of the glove box. These limit how far it opens. Gently push them inwards to release the box. This lets it drop further down.
Once the glove box is lowered, you’ll see the filter cover. It’s usually a rectangular panel. Look for clips or screws securing it. Remove these to access the filter. Carefully slide the old filter out.
Now, you’re ready to install a new cabin air filter. This simple task improves air quality. It also ensures your Honda Civic’s system runs smoothly.
Removing The Old Filter
Removing the old cabin air filter from a Honda Civic is simple. This process involves accessing the filter located behind the glove box. Follow these steps to efficiently remove the old filter.
Releasing The Glove Box
Begin by opening the glove box completely. Empty it to prevent items from falling. Locate the side clips on both sides of the glove box. Gently push these clips inward to release the glove box. Once released, the glove box will hang down, exposing the filter compartment.
Extracting The Filter
With the glove box open, find the filter housing cover. It’s a rectangular panel directly behind the glove box. Pinch the tabs on the cover to unlatch it. Carefully remove the cover to access the filter. Slide the old filter out from its slot. Note its orientation for reference. Dispose of the old filter responsibly.
Installing The New Filter
Replacing the cabin air filter in a Honda Civic is straightforward. First, locate the filter behind the glove box. Then, remove the old filter and insert the new one, ensuring it’s seated properly. Regular replacement helps maintain clean air inside your car.
Installing the cabin air filter in your Honda Civic is a straightforward task that can significantly enhance your driving experience. Imagine cruising down the highway with the fresh scent of purified air, free from dust and allergens. This simple DIY project not only saves you money but also empowers you to take control of your car’s maintenance. Ready to breathe cleaner air? Let’s dive into the process of installing the new filter.Positioning The New Filter
Begin by locating the slot where the old filter was placed. It’s crucial to ensure the new filter is oriented correctly. Look for arrows or indicators on the filter that show airflow direction. Place the filter in the designated area, aligning it with these directional markers. This step is critical to ensure it functions properly. Take a moment to visualize how the filter sits snugly within the compartment. If it seems off, adjust it gently until it fits perfectly.Ensuring Proper Fit
Once positioned, double-check that the filter is seated securely. A loose fit can compromise its effectiveness, allowing unfiltered air to pass through. Feel the edges of the filter, making sure there are no gaps. If there are, gently reposition it until the edges align. Picture the satisfaction of knowing your filter is perfectly installed, optimizing your car’s air quality. Does it feel right? Trust your instincts; if it feels off, it’s worth the effort to adjust. By taking these steps, you not only improve your Honda Civic’s air quality but also gain a sense of accomplishment. Who knew such a small task could make a big impact on your driving comfort?Reassembling The Glove Box
Installing a cabin air filter in a Honda Civic involves reassembling the glove box. Start by removing the glove box to access the filter compartment. Replace the old filter with a new one, ensuring it fits snugly. Carefully reattach the glove box, making sure all clips and screws are secure for proper function.
Reassembling the glove box is the final step in installing your Honda Civic cabin air filter. This part may seem tricky but with patience, it becomes easy. Follow these steps to secure everything properly and ensure smooth operation.Securing The Glove Box
First, align the glove box with its hinges. Check that the hinges fit correctly into the slots. This ensures that the glove box will open and close smoothly. Next, insert the screws into the holes on each side. Use a screwdriver to tighten them securely. Ensure that each screw is firm but not overly tight. This prevents damage to the plastic components. Once the glove box is attached to the hinges, test its movement. Open and close it gently a few times. Make sure that it swings freely without obstruction. If you notice any resistance, check the alignment again. Adjust if necessary to ensure proper fit.Final Checks
After securing the glove box, inspect the area for any loose items. Ensure that all tools and spare parts are removed from the vicinity. This prevents rattling and keeps the compartment tidy. Now, check the cabin air filter’s installation. Verify that the filter is seated properly within its housing. Finally, sit in the passenger seat and examine the glove box. Make sure it is flush with the dashboard. It should not protrude or sag. If it appears uneven, revisit the hinge alignment and adjust accordingly. A well-aligned glove box improves the car’s interior aesthetics.Maintenance Tips
Maintaining the cabin air filter in your Honda Civic is more than just a routine task—it’s a gateway to a fresher, healthier driving environment. Think about the air you breathe inside your car. Regular maintenance of this small yet crucial component ensures that you and your passengers enjoy clean air free from pollutants and allergens. Let’s delve into some essential maintenance tips to keep your cabin air filter in top shape.
When To Replace The Filter
Knowing when to replace your cabin air filter can save you from unnecessary hassle. Typically, you should consider replacing it every 12,000 to 15,000 miles. However, if you often drive in dusty areas or heavy traffic, you might need to check and replace it more frequently.
One personal experience taught me the importance of this. After a long road trip through the desert, the air in my Civic started smelling musty. A quick check revealed a clogged filter. Replacing it brought back the fresh air, emphasizing the value of timely maintenance.
Benefits Of Regular Replacement
Replacing your cabin air filter regularly offers numerous benefits. Firstly, it helps maintain optimal air quality inside your car by filtering out dust, pollen, and other harmful particles. This is crucial for anyone with allergies or respiratory issues.
Moreover, a clean filter prevents strain on your car’s HVAC system, ensuring it runs efficiently. This could even lead to better fuel economy. Imagine cruising down the road, knowing you’re breathing cleaner air and possibly saving on gas. Isn’t that worth the effort?
Lastly, regular replacement minimizes unpleasant odors inside your vehicle. No one wants to drive in a car that smells like a wet dog or a musty basement. By keeping your filter clean, you create a more pleasant and inviting atmosphere for every journey.
So, how often do you check your cabin air filter? Could this simple task make your drives more enjoyable? Taking a few minutes to maintain this small component can have a significant impact on your driving experience.
Credit: www.serrahondachampaign.com
Frequently Asked Questions
Which Way Does The Cabin Air Filter Go On A Honda Civic?
Insert the cabin air filter with the arrow pointing towards the engine. This ensures proper airflow direction. Check the filter for any markings indicating airflow direction. Always consult your Honda Civic’s manual for specific instructions. Regularly replace the filter for optimal air quality inside your vehicle.
Which Way Should My Cabin Air Filter Go?
Install the cabin air filter with the airflow arrows pointing in the direction of airflow. Typically, this is downwards. Check your vehicle’s manual for specific instructions. Proper installation ensures optimal performance and air quality.
Can I Install A Cabin Air Filter Myself?
Yes, you can install a cabin air filter yourself. Follow the vehicle’s manual for guidance. Ensure you have the right tools and replacement filter. This task typically requires minimal skills and time. Always check the filter’s orientation for proper airflow.
Regular replacement ensures optimal air quality inside your car.
Can A Dirty Cabin Filter Affect Ac?
Yes, a dirty cabin filter can reduce AC efficiency. It restricts airflow, causing the system to work harder, using more energy. Regular cleaning or replacement ensures optimal performance and air quality inside your vehicle.
Conclusion
Changing your Honda Civic’s cabin air filter is easy. You just need a few tools and some patience. Regularly replacing this filter keeps your air clean. It also improves your car’s ventilation. Follow the steps outlined to avoid issues. Clean air leads to a better driving experience.
Don’t ignore this simple maintenance task. Your car and health will thank you. Stay proactive and ensure your car’s comfort. Doing it yourself saves time and money. Keep your Honda Civic in top shape. Enjoy a fresh and pleasant ride every time.

Automotive Specialist & Expert Mechanic
Noah Brooks is a skilled automotive expert with a passion for both the technical and creative aspects of the automotive world. With years of experience in repairing, restoring, and enhancing vehicles, Noah is known for his deep knowledge of car mechanics, parts, and accessories. His expertise extends to welding, troubleshooting, and offering advice on the latest car technologies and trends. Whether it’s diagnosing complex issues or guiding readers through DIY car repairs, Noah’s blog posts are filled with hands-on insights that appeal to both novice and experienced car enthusiasts. When he’s not writing, Noah is working on his own car projects, continually learning and sharing his automotive passion with the world.