How to Clean Yellow Headlights: Ultimate Shine Guide
Have you ever noticed your car’s headlights looking dull or yellowed? You’re not alone.
Over time, headlights can become cloudy and lose their original clarity, which can make driving at night both challenging and unsafe. The good news is, you don’t need to be a car expert or spend a fortune to restore them to their former glory.
In this guide, you’ll discover simple, effective methods to clean yellow headlights at home. Imagine driving with headlights that shine bright and clear, making your night journeys safer and more enjoyable. Keep reading, and soon you’ll learn how to enhance your car’s appearance and safety with just a few easy steps.
Credit: www.youtube.com
Causes Of Yellowing
Have you ever noticed your car headlights turning a dull yellow? It’s a common issue that can affect the look and safety of your vehicle. Understanding the causes of this yellowing can help you prevent it in the future. Let’s dive into some of the key factors that contribute to this problem.
Uv Exposure
Sunlight is a powerful force. It’s not just affecting your skin, but also your car headlights. The UV rays from the sun can cause the clear plastic of headlights to break down over time. This degradation leads to the yellowing you see. Imagine leaving your car parked outside day after day, the relentless sun beating down. It’s a recipe for headlight discoloration.
Environmental Factors
Think about where you drive most often. If you’re on dusty roads or in areas with frequent smog, these environmental elements can contribute to headlight yellowing. Dirt and debris can accumulate, creating a layer that slowly wears away the protective surface of your headlights. Have you ever noticed how the headlights look after a long trip through dusty terrain? It’s not just dirt; it’s the start of yellowing.
Chemical Reactions
Have you ever used a cleaner that seemed to do more harm than good? Certain cleaning products can react with the plastic of your headlights. This reaction might accelerate yellowing rather than prevent it. It’s crucial to choose the right products for cleaning. Ever found yourself regretting a quick fix that promised results? In the case of headlights, the wrong cleaner can be a costly mistake.
So, what can you do? Be mindful of where you park, choose the right cleaning products, and consider headlight covers for extra protection. What steps will you take to keep your headlights shining bright and clear?

Credit: www.facebook.com
Essential Cleaning Tools
Cleaning yellow headlights requires essential tools like baking soda, vinegar, and microfiber cloths. Mix baking soda with vinegar to form a paste, then gently scrub the headlights with a cloth. Regular maintenance keeps them clear and improves visibility on the road.
Are your car’s yellow headlights making your vehicle look older than it is? You’re not alone. Many drivers face this issue, but the solution is surprisingly simple. With the right tools, you can restore your headlights to their original clarity. Let’s dive into the essential cleaning tools you’ll need.
Cleaning Solutions
To tackle the grime and oxidation, you’ll need a good cleaning solution. Household items like toothpaste or baking soda mixed with water can do wonders. If you prefer ready-made solutions, automotive stores offer products specifically designed for headlight restoration. Choose what fits your comfort level. A friend of mine swears by toothpaste, claiming it’s been his go-to for years. What will you choose?
Microfiber Cloths
Microfiber cloths are essential for cleaning headlights effectively. They are gentle on surfaces and won’t scratch your headlights like rougher materials might. Plus, they are excellent at capturing dirt and grime. Imagine wiping away years of buildup with just a few swipes. I once used an old t-shirt and ended up regretting it—stick with microfiber for the best results.
Polishing Pads
After cleaning, polishing pads come into play. These pads help to buff out scratches and restore shine. A handheld polishing tool can make the job easier, but manual pads work well too. Consider it the finishing touch to your headlight makeover. A neighbor of mine used a polishing pad for the first time and couldn’t believe the difference. Will you be amazed too? — Armed with these tools, the daunting task of cleaning yellow headlights becomes manageable and even enjoyable. Are you ready to see your car in a new light?
Preparation Steps
Cleaning yellow headlights can improve your car’s appearance and lighting. Proper preparation ensures the task is quick and effective. Follow these steps for the best results. Each step is crucial for achieving clear, bright headlights.
Gathering Materials
Start by collecting all necessary materials. You will need a clean microfiber cloth, soap, water, masking tape, and a soft sponge. For deeper cleaning, consider a headlight restoration kit. These kits often include sandpaper and polish.
Protecting Surrounding Areas
Use masking tape to protect the car’s paint. Tape around the headlights’ edges carefully. This prevents accidental scratches and damage. Ensure the tape covers all parts near the headlights.
Initial Cleaning
Begin by washing the headlights with soap and water. Use a soft sponge for this step. Remove any dirt or grime gently. Rinse with clean water and dry with a microfiber cloth. This prepares the surface for deeper cleaning.
Diy Cleaning Methods
Revitalize yellow headlights with simple DIY cleaning methods. Mix toothpaste with water, then gently scrub the surface. Rinse thoroughly to restore clarity and improve nighttime visibility.
Are your headlights looking dull and yellow? Don’t worry, you’re not alone. Many car owners face this issue as headlights age and get exposed to the elements. But you don’t need to spend a fortune on professional cleaning or replacements. There are simple DIY methods that can help restore the sparkle to your headlights. Whether it’s baking soda, toothpaste, or sandpaper, these techniques are straightforward and effective. Let’s explore these methods and get your headlights shining bright once again.
Baking Soda And Vinegar
Baking soda and vinegar are not just for cleaning your kitchen—they’re great for headlights too! This dynamic duo can tackle grime with ease. Start by mixing a paste of baking soda and water. Apply it to the headlights using a soft cloth. The gentle abrasiveness of baking soda helps scrub away dirt. Next, spritz some vinegar over the paste. The fizzing reaction is not just fun to watch—it helps lift stubborn stains. Rinse with water and wipe dry. Have you tried this simple trick before?
Toothpaste Technique
Toothpaste isn’t just for your teeth; it can be a surprising ally for your headlights. The mild abrasives in toothpaste work wonders on yellowed surfaces. Apply a small amount of toothpaste to a damp cloth. Rub it onto the headlights in circular motions. You’ll notice the grime coming off almost immediately. Rinse the headlights with water and dry with a clean cloth. Who knew your bathroom cabinet held the key to clearer headlights?
Sandpaper And Polish
Sometimes, your headlights need a little more elbow grease. Sandpaper followed by polish can restore them beautifully. This method is excellent for those who don’t mind getting hands-on. Start with a fine-grit sandpaper. Wet the headlights and sand gently in a circular motion. This removes the top layer of oxidation and smooths out scratches. After sanding, apply a quality polish. Buff until the surface is clear and shiny. Does this sound like a project you’d tackle on a weekend afternoon? Taking care of your headlights not only improves your car’s appearance but also enhances your safety on the road. Which method will you try first to see the transformation?
Commercial Products
Restore your yellow headlights with simple cleaning methods. Use toothpaste or baking soda for effective results. Apply gently, rinse, and enjoy brighter lights.
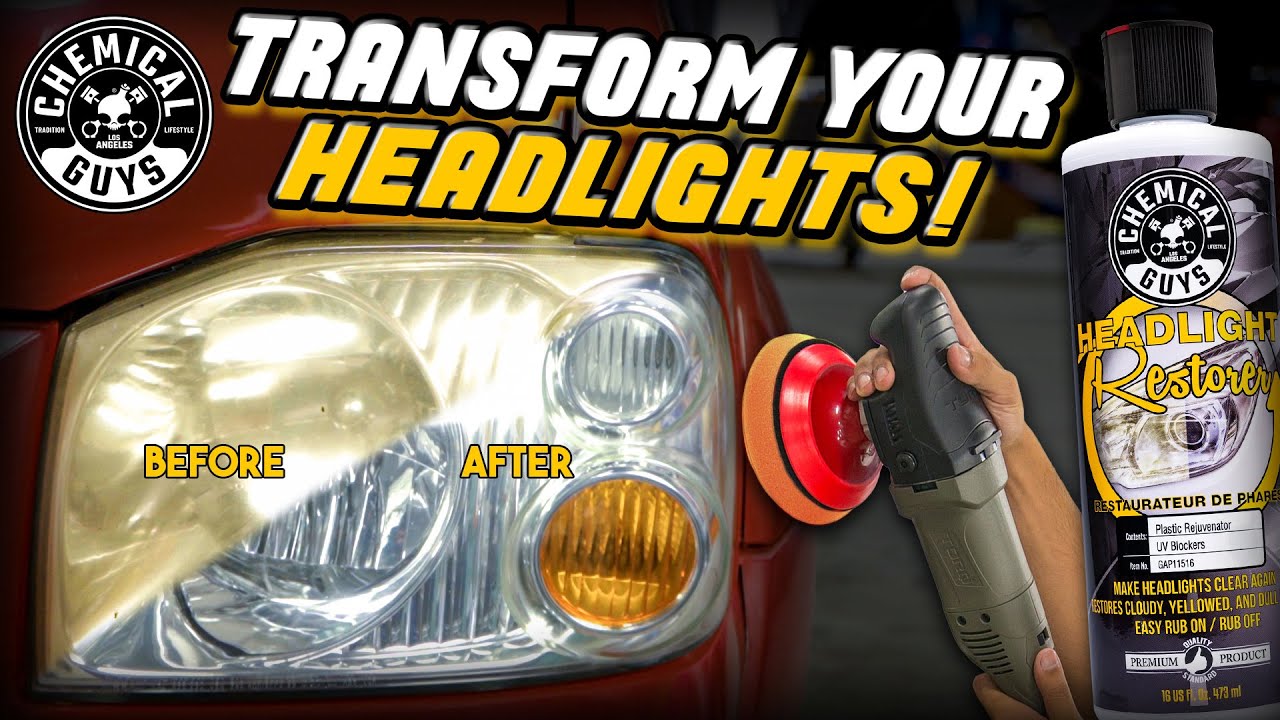
Cleaning yellow headlights can be a daunting task, but commercial products make it easier and more effective. These products are specifically designed to restore clarity to your headlights, offering a range of solutions to suit different needs and budgets. Whether you’re looking for a complete restoration kit, a simple polishing compound, or a protective coating, there’s a commercial product that can help you achieve crystal-clear headlights.
Headlight Restoration Kits
Headlight restoration kits are all-in-one solutions for tackling yellowed headlights. They typically include everything you need: sanding pads, polishing compounds, and protective coatings. You might feel a bit overwhelmed by the variety available, but choosing a well-reviewed kit can make the process straightforward. A friend once shared how using a restoration kit transformed his dim headlights into bright beacons. The kit came with step-by-step instructions, making the process simple and quick. Isn’t it amazing how a little effort can dramatically improve your car’s appearance and safety?
Polishing Compounds
Polishing compounds are another effective option for cleaning yellow headlights. These products focus on removing the oxidation that causes yellowing. You’ll find them in the form of liquids or pastes, often requiring nothing more than a cloth and elbow grease to apply. Imagine spending a sunny afternoon in your driveway, applying a polishing compound and watching the yellow haze vanish. It’s a satisfying task that can save you from costly replacements. Plus, you get the joy of seeing your car sparkle afterwards.
Protective Coatings
After cleaning your headlights, protective coatings can help keep them clear for longer. These coatings act as a barrier against the elements, preventing future yellowing. Applying them is usually straightforward, with most products available in spray or wipe-on formats. Think about how much longer your headlights will stay clear and bright with a protective coating. It’s a small investment that pays off by preserving your efforts and maintaining visibility on the road. Wouldn’t it be nice to enjoy the clarity without constant maintenance? Choosing the right product depends on your needs and preferences. Each option has its merits, so consider what suits you best. And remember, clear headlights don’t just enhance your car’s look—they also improve safety during nighttime driving.
Maintenance Tips
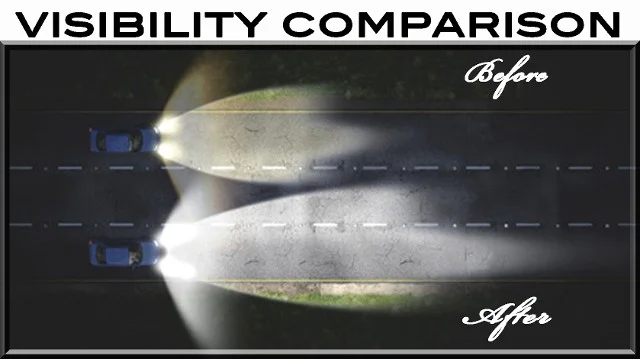
Keeping your car’s headlights clean enhances both aesthetics and safety. Yellowed headlights can dim light output, posing a risk during night drives. Regular maintenance keeps them clear and bright, ensuring the best visibility.
Regular Cleaning Routine
Establish a cleaning routine for your headlights. Use mild soap and water. Gently scrub the surface with a soft cloth or sponge. Rinse thoroughly and dry with a microfiber towel. This removes dirt and grime, preventing yellowing.
Do this every few weeks. Regular care keeps your headlights looking new and bright. It also prevents buildup that can lead to discoloration.
Protective Measures
Protect your headlights from sun damage. Apply a UV protective coating. This minimizes exposure to harmful rays. Cover your car when parked outside. Use a car cover or park in shaded areas.
Protection reduces the chance of yellowing. It keeps the headlights clear longer. Consider using a headlight film. This adds an extra layer of defense against the elements.
Long-term Solutions
For long-term clarity, consider professional treatments. Headlight restoration kits are available. They polish and seal the surface, maintaining clarity. This solution can last several months.
Regularly inspect your headlights. Look for signs of yellowing or haze. Early detection allows for prompt action, preserving light output.
Safety Considerations
Cleaning yellow headlights requires attention to safety. Wear protective gloves and goggles to prevent chemical exposure. Ensure the car is off and parked securely before starting the cleaning process.
Cleaning yellow headlights can make your car look newer and improve your visibility at night. However, safety should be your top priority during the process. It’s crucial to consider various safety measures to protect yourself and your surroundings. By being cautious, you ensure not only a successful cleaning job but also your well-being.
Proper Ventilation
When cleaning your headlights, you might use chemicals that can release harmful fumes. Make sure you’re working in a well-ventilated area to avoid inhaling these fumes. Open your garage door, or better yet, work outside to ensure fresh air circulation.
Protective Gear
It’s essential to protect your skin and eyes while cleaning. Wear gloves to shield your hands from chemicals. Safety goggles are also a smart choice to prevent any accidental splashes from reaching your eyes.
Handling Chemicals
Cleaning products can be potent, so handle them with care. Always read the labels on the products you use. If you’re using a homemade solution, ensure you know the ingredients and their effects. Have you ever noticed how some products seem harmless but can cause irritation? Keep a first-aid kit nearby just in case you need to rinse your eyes or skin quickly. By taking these safety considerations seriously, you can focus on the task at hand and enjoy the satisfaction of clear, shiny headlights without any mishaps. What other safety tips do you think are important when tackling a DIY project like this?

Credit: www.autonationmobileservice.com
Frequently Asked Questions
How To Get Yellow Headlights Clear?
Clean yellow headlights using toothpaste or baking soda mixed with water. Rub gently with a soft cloth, rinse, and dry. For lasting results, apply a UV sealant. Regular maintenance ensures clarity and safety. Always test a small area first to avoid damage.
Does Wd-40 Remove Yellow From Headlights?
WD-40 can temporarily clear yellow haze from headlights. It removes grime and dirt, improving visibility. For long-lasting results, use professional restoration kits. Regular maintenance keeps headlights clean and clear. Always test WD-40 on a small area first to ensure compatibility with the headlight material.
Does Magic Eraser Clean Yellow Headlights?
Yes, a magic eraser can clean yellow headlights effectively. It gently removes oxidation and restores clarity. Make sure to apply it with light pressure to avoid scratches. Always rinse and dry the headlights after cleaning for best results. Regular maintenance helps maintain headlight clarity.
What Causes Headlights To Yellow?
Ultraviolet (UV) rays, oxidation, and environmental factors cause headlights to yellow over time. Dirt and grime buildup also contributes. Regular cleaning and using UV-resistant sealants can help prevent this.
Conclusion
Cleaning yellow headlights is simple and effective. Clear headlights improve night driving safety. Regular cleaning keeps them bright and clear. Use simple household items for quick results. Always protect headlights after cleaning. This prevents future yellowing. Remember, clean headlights enhance your car’s appearance.
They also make a big difference in driving experience. Maintain them often for best results. Doing so ensures safety and better visibility. Enjoy clear headlights and safer travels. Happy driving!

Automotive Specialist & Expert Mechanic
Noah Brooks is a skilled automotive expert with a passion for both the technical and creative aspects of the automotive world. With years of experience in repairing, restoring, and enhancing vehicles, Noah is known for his deep knowledge of car mechanics, parts, and accessories. His expertise extends to welding, troubleshooting, and offering advice on the latest car technologies and trends. Whether it’s diagnosing complex issues or guiding readers through DIY car repairs, Noah’s blog posts are filled with hands-on insights that appeal to both novice and experienced car enthusiasts. When he’s not writing, Noah is working on his own car projects, continually learning and sharing his automotive passion with the world.