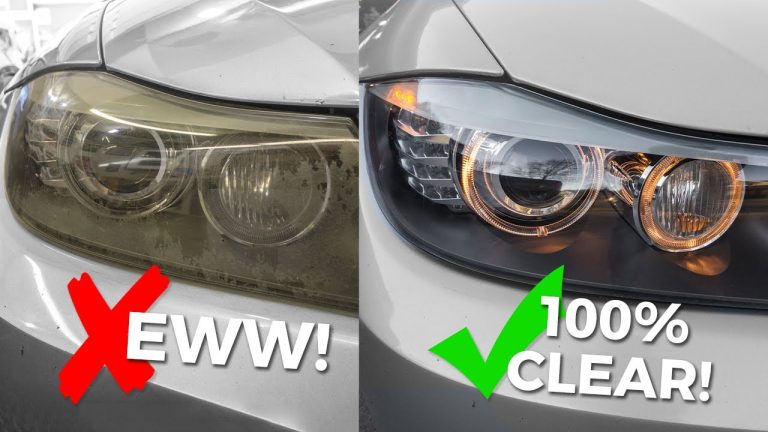
How to Replace a Headlight: Step-by-Step Guide
Is your car’s headlight dimming or completely out? You’re not alone.
Many car owners face this issue, and the good news is you can fix it yourself! Replacing a headlight might sound daunting, but with the right guide, it’s simpler than you think. Imagine driving at night with clear, bright lights—no more squinting or straining to see the road ahead.
Plus, you’ll save money by not heading to the mechanic. You’ll discover step-by-step instructions on how to replace a headlight, ensuring your vehicle is road-ready and safe. Ready to tackle this simple DIY task? Let’s get started and illuminate your driving experience!
Tools And Materials Needed
Replacing a headlight is a task many drivers can handle. With the right tools and materials, it becomes a manageable job. Being prepared with the necessary items saves time and frustration. Let’s explore what you need to get started.
Tools You Will Need
Basic tools make the job easier and safer. A screwdriver is essential. Most headlights need a Phillips or flathead screwdriver. It helps in removing screws that hold the headlight in place. A socket set is also useful. It aids in loosening bolts that secure the headlight. Having both tools ready is wise.
Protective Gear
Safety is crucial when replacing a headlight. Wear gloves to protect your hands from sharp edges. They also keep oils from your skin off the new bulb. Safety glasses shield your eyes from dust and debris. Ensure you wear them during the process.
Replacement Bulb
The right replacement bulb is vital for success. Check your car manual to find the correct bulb type. This ensures compatibility and proper lighting. Purchase a quality bulb from a reputable source. Avoid cheap options that may fail quickly.
Cleaning Materials
A clean area improves visibility and safety. Use a soft cloth to wipe down the headlight assembly. Remove dirt and grime before installing the new bulb. This step helps the new bulb perform at its best. It also extends the life of the headlight.
Safety Precautions
Ensure vehicle is off and parked on level ground before replacing a headlight. Use gloves to handle bulbs, preventing oil transfer and damage. Check the manual for specific instructions and tools needed for safe replacement.
Replacing a headlight may seem straightforward, but safety precautions are crucial to ensure a smooth and accident-free process. Whether you’re a seasoned car enthusiast or a first-timer, knowing how to protect yourself and your vehicle is key. You don’t want to end up with an injury or a damaged car. Taking a few simple steps can make all the difference in your DIY project. Let’s dive into the essential safety measures you should take.1. Wear Protective Gear
Always wear gloves to protect your hands from sharp edges or hot surfaces. Safety goggles are also essential to prevent dust or debris from getting into your eyes. Simple protective gear can shield you from unexpected mishaps. Imagine dropping a screw while working; your gloves ensure you avoid cuts or burns from hot components.2. Switch Off The Vehicle
Make sure your car is turned off before you start working on the headlight. This prevents any electrical hazards. Turning off the vehicle ensures that you’re not accidentally shocked by electrical currents. It’s a basic step, but skipping it can lead to serious risks.3. Disconnect The Battery
Disconnecting the battery is a crucial safety step. It prevents electrical accidents and ensures the vehicle remains inactive during the replacement. Remember that time when you accidentally tripped over a wire and the engine roared to life? Disconnecting the battery eliminates such surprises, keeping you safe.4. Use The Right Tools
Using the appropriate tools not only makes the job easier but also reduces the risk of damaging the car. Make sure you have all necessary tools before starting. A well-equipped toolbox is your best friend. Using the wrong tool can make a simple task frustrating and potentially harmful to your car’s components.5. Work In A Well-lit Space
Ensure your workspace is well-lit to avoid mistakes. Proper lighting helps you see clearly and prevents accidents. Working in dim light increases the risk of errors. Imagine misplacing the headlight due to poor visibility—good lighting eliminates this possibility.6. Secure Your Vehicle
Park your vehicle on a flat surface and use wheel chocks if necessary. This prevents the car from rolling during the replacement. Have you ever tried replacing something on an uneven surface? It’s a recipe for disaster. Securing your vehicle ensures stability and safety.7. Read The Manual
Consult your car’s manual for specific instructions related to your vehicle model. This helps you understand any unique requirements for replacing the headlight. The manual is your guide to avoiding mistakes. It’s surprising how many people skip this step, leading to confusion and errors. By taking these safety precautions, you ensure a safe and efficient headlight replacement. Are there any safety steps you might be overlooking? Ensuring every precaution is followed can save you time and headaches.Locating The Headlight Assembly
Replacing a headlight starts with finding the headlight assembly. This is where your car’s headlights are housed. Locating it is crucial for a smooth replacement process. Knowing its exact location helps avoid any unnecessary dismantling of car parts.
Most vehicles have the headlight assembly at the front. Yet, some models might have different placements. Ensure you know where to look before proceeding.
Consulting The Vehicle Manual
Your vehicle manual is a valuable resource. It provides detailed information about your car. Check the manual for diagrams and instructions. These will guide you to the headlight assembly.
Manuals often have a section dedicated to headlights. Refer to this section for accurate details. This ensures you are on the right track.
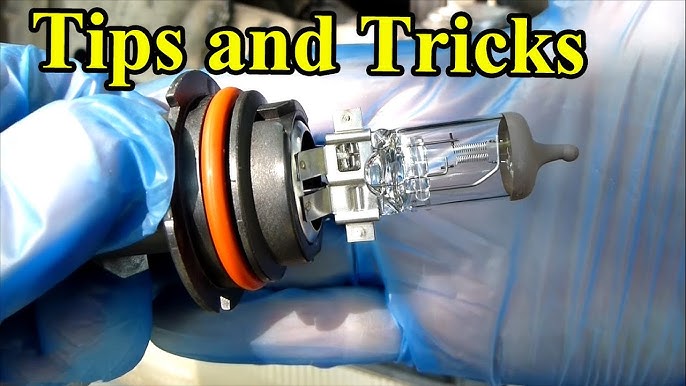
Identifying The Headlight Type
Identify the type of headlight your car uses. Headlights come in various types like halogen, LED, and HID. Each type has different replacement procedures.
Knowing your headlight type helps in buying the right replacement. It also aids in understanding the tools needed for the job.

Credit: www.youtube.com
Removing The Old Headlight
Replacing a headlight may seem daunting, but it’s quite simple. Removing the old headlight is the first step in this process. With a little guidance, anyone can tackle this task with confidence. Follow these easy steps to access, disconnect, and remove the old headlight.
Accessing The Headlight Compartment
Start by opening the hood of your car. Look for the back of the headlight assembly. It’s usually found near the front of the engine bay. You might need to remove some covers or panels. Check your car’s manual for specific instructions. This will help you locate any clips or screws.
Disconnecting The Power Supply
Find the power connector attached to the headlight. It’s a small plug with wires leading to it. Gently squeeze the tab on the connector. Pull it away from the headlight to disconnect. Ensure the wires are safe and tucked away. This prevents damage during the removal process.
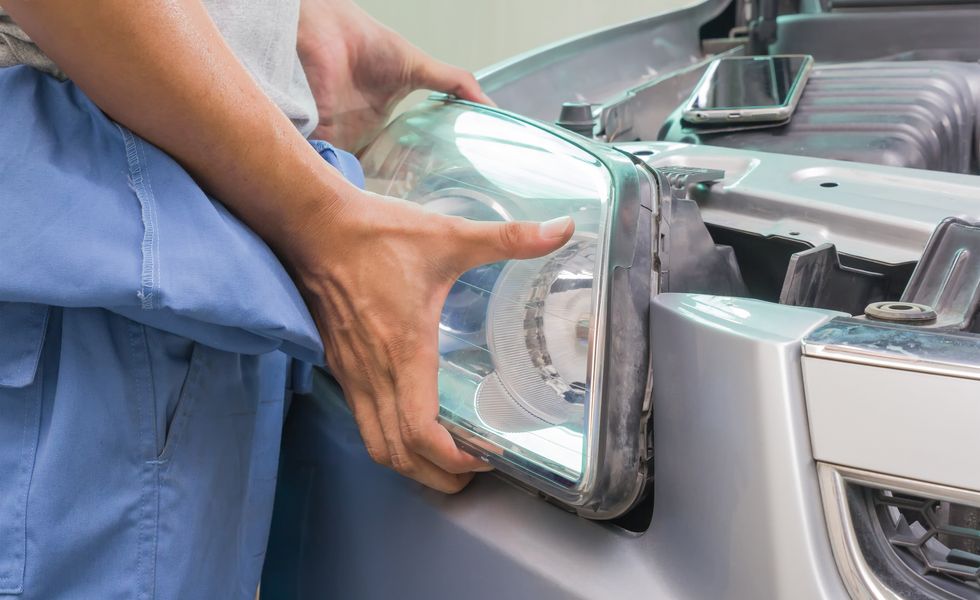
Unscrewing And Removing The Headlight
Locate the screws or bolts securing the headlight. Use the right tools, like a screwdriver or wrench. Carefully unscrew each fastener and set them aside. Hold the headlight firmly and pull it out of the assembly. If it’s stuck, wiggle it gently to loosen. This completes the removal of the old headlight.
Installing The New Headlight
Replacing a headlight can seem tricky. But with the right steps, it’s manageable. Once you’ve removed the old headlight, it’s time for the exciting part. Installing the new headlight. This step ensures your car shines bright on the road.
Positioning The New Headlight
First, hold the new headlight in your hand. Ensure the glass side faces outwards. Gently fit it into the empty space. Make sure it aligns correctly. This prevents future issues and misalignment.
Securing The Headlight
Now, grab the screws or clips. Carefully tighten them around the headlight. This keeps it secure in place. Check that it doesn’t wobble or move. A stable headlight is crucial for safe driving.
Reconnecting The Power Supply
It’s time to reconnect the power. Find the headlight’s power connector. Attach it to the new headlight’s socket. Ensure it’s snug and tight. This restores power to your new headlight. Test it by turning on your car’s lights.
Testing The New Headlight
After installing a new headlight, testing its performance is crucial. This ensures your safety on the road. Proper testing helps identify any installation issues. Also, it confirms that the headlight functions correctly.
Verifying Proper Functionality
Turn on the new headlight. Check if it lights up immediately. Observe the brightness. It should match or exceed the previous one. Ensure there are no flickers or dim spots. Both high and low beams must work perfectly. Listen for unusual sounds or buzzes. A steady hum indicates a secure connection.
Adjusting The Headlight Alignment
Proper alignment is vital for safe driving. Park your car on a level surface. Face a wall or garage door. The car should be 25 feet away. Turn on the headlights. Mark the center of the light beams on the wall. Use a measuring tape to verify alignment. Adjust the headlights using the adjustment screws. Ensure both beams hit the marked spots equally.
Improper alignment can blind other drivers. It can also reduce road visibility. Aim for a balance that illuminates the road without causing glare. Proper adjustment enhances night driving safety.
Troubleshooting Common Issues
Replacing a headlight might seem simple. Yet, unexpected issues can arise. Troubleshooting these problems ensures your headlights function correctly. This section covers common issues you may face. And how to solve them effectively.
Addressing Flickering Or Dim Lights
Flickering lights can be frustrating. They often indicate a loose connection. First, check the bulb’s socket. Is it secure? If not, tighten it. Examine the wiring for damage or corrosion. Replace any worn-out wires. Dim lights may result from a dirty lens. Clean it gently with a soft cloth. Ensure the bulb itself is the correct wattage.
Ensuring Proper Fit
A snug fit prevents vibration and loosening. Confirm the bulb matches your vehicle’s specifications. Consult your car’s manual for guidance. Insert the bulb carefully. Align it with the housing slots. Rotate it until it clicks into place. Double-check the installation. The bulb should sit flush and firm.
Credit: www.caranddriver.com
Maintenance Tips
Maintaining your car’s headlights is crucial for safety and efficiency. Regular maintenance ensures clear visibility on the road at night. It can also prevent costly repairs in the future. Proper care can extend the life of your headlights. Here are some simple maintenance tips to keep your headlights in top condition.
Regular Cleaning
Clean your headlights every few weeks. Dirt and grime can build up quickly. Use a soft cloth and mild soap to wipe them clean. Avoid harsh chemicals. They can damage the lens. Ensure they are dry after cleaning to prevent fogging.
Routine Inspections
Check your headlights for damage or wear regularly. Look for cracks or fogging. These can affect the light output. Test your headlights by turning them on and off. Ensure they are bright and functioning properly. Replace them if you notice dimming or flickering.

Credit: payneautogroup.com
Frequently Asked Questions
Can You Replace Your Own Headlight?
Yes, you can replace your own headlight. Check your car manual for instructions. Gather necessary tools and parts. Follow safety precautions while disconnecting the battery and handling bulbs. If unsure, consult a professional or watch tutorial videos for guidance.
Will Autozone Replace My Headlight?
AutoZone can assist with headlight replacements. Many stores offer free installation when you purchase a headlight bulb.
How Much Does It Usually Cost To Replace A Headlight?
Replacing a headlight typically costs between $50 and $150. This includes parts and labor. Prices vary based on vehicle make, model, and location. DIY replacement can reduce costs, but professional installation ensures proper alignment and functionality. Always compare prices and service quality before proceeding.
Can I Drive My Car If One Headlight Is Out?
Driving with one headlight out is illegal in most places. It’s unsafe and reduces visibility. Replace the bulb immediately to avoid fines and ensure safety. Always check local traffic laws for specific regulations.
Conclusion
Replacing a headlight is easier than you think. Follow these steps. Gather your tools. Remove the old bulb. Insert the new one. Test the light. Simple, right? Save money by doing it yourself. Feel proud of your new skill. Safety first; always check your work.
Drive with confidence. Your headlights guide the way. Maintaining them is crucial. Share what you learned. Help others replace their headlights too. Everyone can learn this handy skill. Explore more car maintenance tips. Keep your vehicle in top shape. Stay safe on the road.

Automotive Specialist & Expert Mechanic
Noah Brooks is a skilled automotive expert with a passion for both the technical and creative aspects of the automotive world. With years of experience in repairing, restoring, and enhancing vehicles, Noah is known for his deep knowledge of car mechanics, parts, and accessories. His expertise extends to welding, troubleshooting, and offering advice on the latest car technologies and trends. Whether it’s diagnosing complex issues or guiding readers through DIY car repairs, Noah’s blog posts are filled with hands-on insights that appeal to both novice and experienced car enthusiasts. When he’s not writing, Noah is working on his own car projects, continually learning and sharing his automotive passion with the world.